Originally appeared here:
Transformers Key-Value (KV) Caching Explained
Go Here to Read this Fast! Transformers Key-Value (KV) Caching Explained

When developing computer vision algorithms, the journey from concept to working implementation often involves countless iterations of watching, analyzing, and debugging video frames. As I dove deeper into computer vision projects, I found myself repeatedly writing the same boilerplate code for video visualization and debugging.
At some point, I decided enough was enough, so I created CV VideoPlayer, a Python-based open-source video player package, specifically designed for computer vision practitioners that will solve this problem once and for all.

If you’ve ever developed an algorithm for video analysis, you’ve probably written some version of the following code to help you visualize and debug it:
import cv2

cap = cv2.VideoCapture(<video_path>)
ret = True
while ret:
  ret, frame = cap.read()
  algo_output = some_video_analsys_algorithm(frame)
  frame_to_display = visualizer(frame, algo_output)
  cv2.imshow(frame_to_display)
  cv2.waitKey()
But in almost all projects I’ve worked on this code was rarely enough. As the project went on I found myself adding more and more functionality to help me understand what was going on.
For example:
But the thing that annoyed me the most was the lack of interactivity. Using this kind of code, The visualization is created before rendering and cannot change once displayed. And, while this is okay for simple algorithms, for the more complex ones, there is just way too much information needed for each frame. And without the ability to decide, on the fly, what you want to display, you find yourself running the same video again and again, each time with different visualization parameters.
This process was tedious and exhausting.

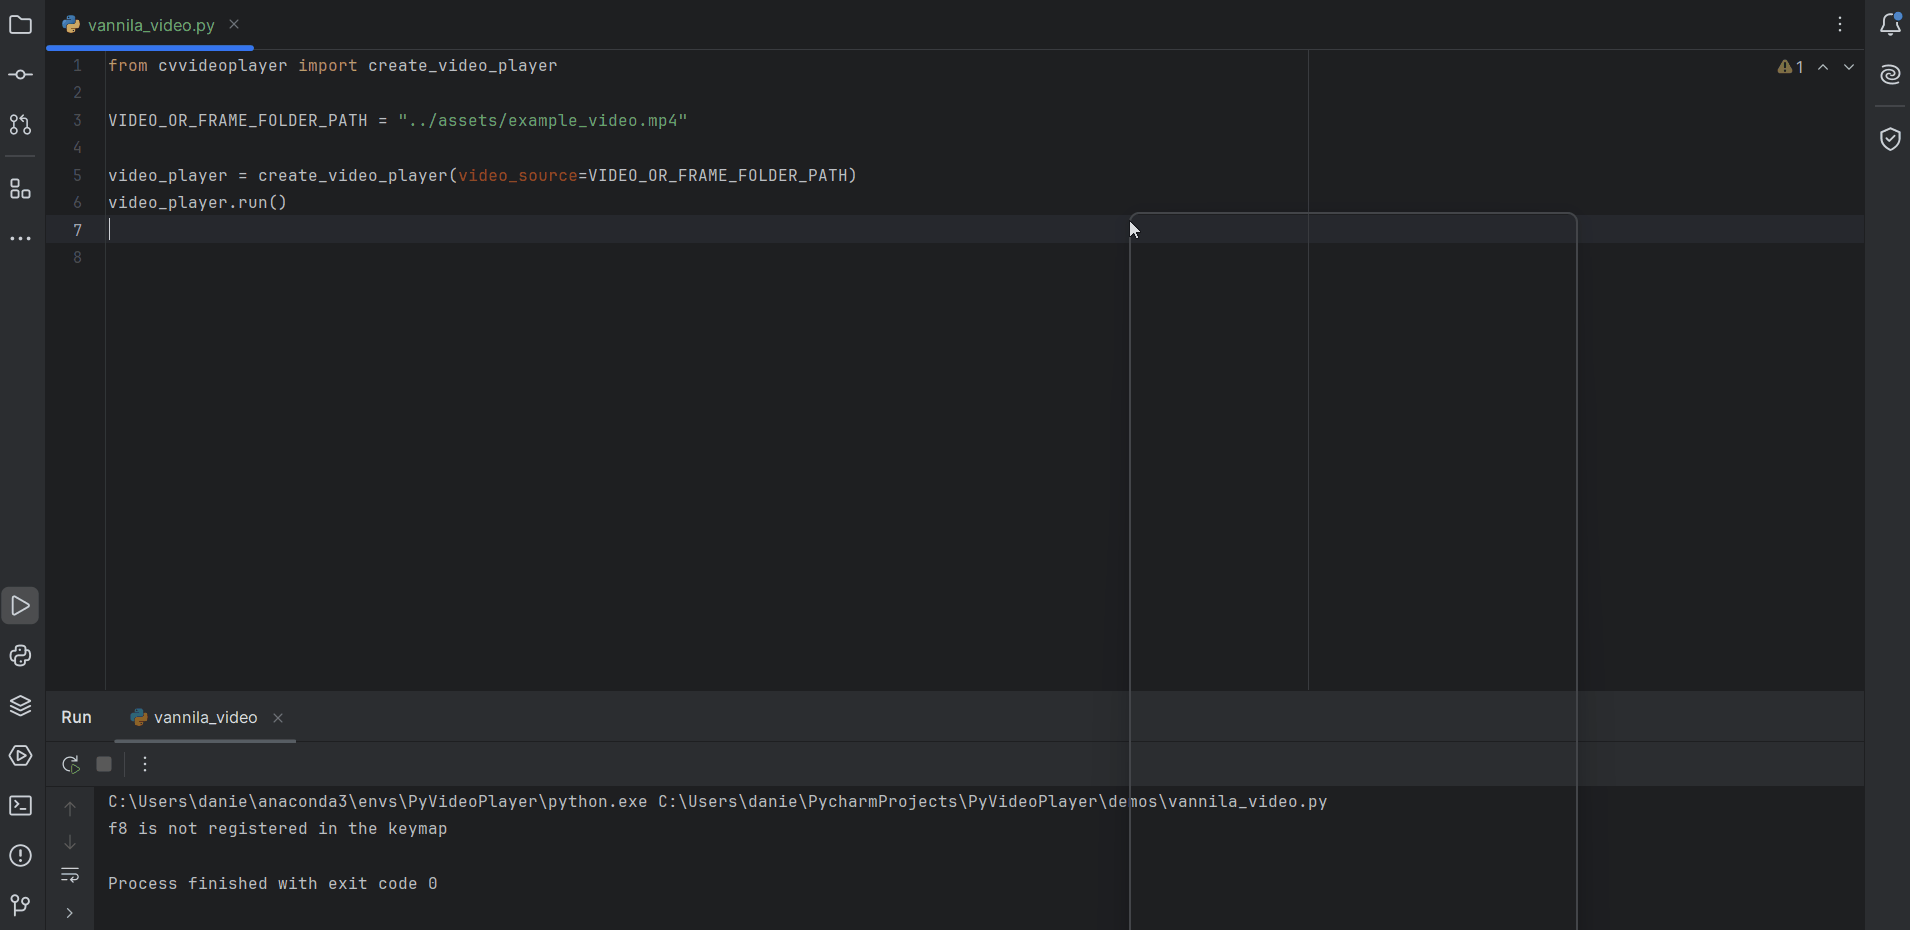
CV VideoPlayer was born from the need for a simple customizable solution for interactively rendering videos and frames. It allows any number of overlays, sidebars, or any other frame edits, each of which can be easily switched on and off by the user during run time. let’s see an example of how this is done:
We start by installing the package using pip install cvvideoplayer
We can then import the video player and run an unedited video with the following code:
from cvvideoplayer import create_video_player

VIDEO_OR_FRAME_FOLDER_PATH = "<add local path here>"

video_player = create_video_player(video_source=VIDEO_OR_FRAME_FOLDER_PATH)
video_player.run()
This will open the video player and allow you to play it with the spacebar or using the arrows, it will also add some default built-in frame-edit-callbacks which we will elaborate on in the following section.
To add custom-built visualization to the video we can use the frame_edit_callbacks argument of the create_video_player constructor function like so:
from cvvideoplayer import VideoPlayer

VIDEO_OR_FRAME_FOLDER_PATH = "<add local path here>"

video_player = create_video_player(
  video_source=VIDEO_OR_FRAME_FOLDER_PATH,
  frame_edit_callbacks=[
            FitFrameToScreen(),
            FrameInfoOverlay(),
            KeyMapOverlay(),
        ]
)
video_player.run()
When unspecified, the default list will be exactly the one in the example above.
There are a bunch of built-in callbacks to use such as:
And more are added with each version.
Here is where the usefulness of the package shines. To add your own custom visualization you create a new class that inherits BaseFrameEditCallback and implements the edit_frame method, for example:
class MyCallback(BaseFrameEditCallback):
    def __init__(
        self,
        enable_by_default: bool = True,
        enable_disable_key: Optional[str] = None,
        additional_keyboard_shortcuts: Optional[List[KeyFunction]] = None
        **any_other_needed_params
    ):
        super().__init__(
            enable_by_default,
            enable_disable_key,
            additional_keyboard_shortcuts
         )

    def edit_frame(
        self,
        video_player: "VideoPlayer",
        frame: np.ndarray,
        frame_num: int,
        original_frame: np.ndarray,
    ) -> np.ndarray:
        """
        This function receives the displayed frame and should return it
        after it has been altered in any way desirable by the user

        Args:
            video_player: an instance fo VideoPlayer
            frame (): the frame to be edited and displayed
            frame_num ():
            original_frame () the frame before any alterations

        Returns: the edited frame
        """
        frame = add_any_visalizations(frame)
        return frame
Additionally, you can add setup and teardown methods by overriding these methods in the parent class:
class MyCallback(BaseFrameEditCallback):
    ...
    def setup(self, video_player: "VideoPlayer", frame) -> None:
        """
        Optionally configure more parameters according to the
        first incoming frame
        """

    def teardown(self) -> None:
        """
        Optionally define how the callback should close when the
        video player is closed
        """
For each callback, CV Video Player allows you to add custom keyboard shortcuts that can change the visualization it does at run time.
The most basic shortcut is enabling/disabling the callback and is created using the enable_disable_key parameter like so:
my_callback = MyCallback(
    enable_disable_key="ctrl+a"
)
The string passed here can be any combination of modifiers (ctrl, alt, and shift) with a letter or number for example: “crtl+alt+s”, “g”, “shift+v”, “crtl+1” and so on.
To add shortcuts that change the visualization itself, you can override theadditional_keyboard_shortcuts property which returns a list of the dataclassKeyFunction .
from cvvideoplayer import KeyFunction

class MyCallback(BaseFrameEditCallback):
    ...
    @property
    def additional_keyboard_shortcuts(self) -> List[KeyFunction]:
      [
          KeyFunction(
              key="alt+r",
              function=self.a_function_to_modify_the_visualiztion,
              description="what this does"
          )
      ]
A KeyFunction is constructed using three arguments:
In many cases, the KeyFunction will receive a function that toggles some boolean attribute of the callback, which will change something that the edit_framemethod does. So something like:
from cvvideoplayer import KeyFunction

class MyCallback(BaseFrameEditCallback):
...
    @property
    def additional_keyboard_shortcuts(self) -> List[KeyFunction]:
      [
          KeyFunction(
              key="alt+r",
              function=self.a_function_to_modify_the_visualiztion,
              description="what this does"
          )
      ]
    def a_function_to_modify_the_visualiztion():
        self._draw_something = bool(1 - self._draw_somthing)
Many times, I found myself wanting to compare two different visualizations side by side. For example, comparing two detectors or an algorithm’s output with the original frame without modifications, and so on.
To do that I added double_frame_mode which can be turned on by:
video_player = create_video_player(
  ...
  double_frame_mode=True
)
The video at the beginning of this blog is an example of what this mode looks like.
In this mode, you can use “ctrl+1” and “ctrl+2″ to decide which frame visualization you want to control with the keyboard.
By default, both frames will have the same callbacks available but if you want different callbacks for the right frame you can use the right_frame_callback argument to give the right frame a different set of callbacks (the left frame will have the ones passed to the frame_edit_callback argument):
video_player = create_video_player(
    ...
    double_frame_mode=True
    right_frame_callbacks = [callback1, callback2, ...]
)
I Hope this tool comes in handy for all of you. If you have any ideas on how to improve it, please let me know in the issues tab on the project’s GitHub page, and don’t forget to leave a star while you’re at it 🙂 …
CV VideoPlayer — Once and For All was originally published in Towards Data Science on Medium, where people are continuing the conversation by highlighting and responding to this story.
Originally appeared here:
CV VideoPlayer — Once and For All
Go Here to Read this Fast! CV VideoPlayer — Once and For All
10 essential steps, from data exploration to model deployment.
Originally appeared here:
Sentiment analysis template: A complete data science project
Go Here to Read this Fast! Sentiment analysis template: A complete data science project


Originally appeared here:
Accelerate your ML lifecycle using the new and improved Amazon SageMaker Python SDK – Part 2: ModelBuilder

Originally appeared here:
Accelerate your ML lifecycle using the new and improved Amazon SageMaker Python SDK – Part 1: ModelTrainer

Originally appeared here:
Amazon Q Apps supports customization and governance of generative AI-powered apps

Originally appeared here:
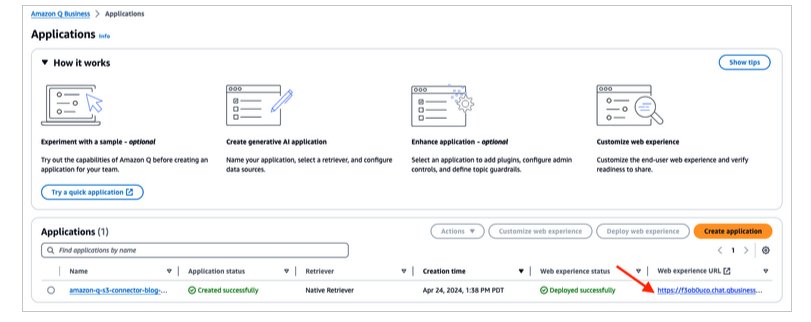
Answer questions from tables embedded in documents with Amazon Q Business
Go Here to Read this Fast! Answer questions from tables embedded in documents with Amazon Q Business


This is the first in a two-part series on using SQLite for machine learning. In this article, I dive into why SQLite is rapidly becoming a production-ready database. In the second article, I will discuss how to perform retrieval-augmented-generation using SQLite.
If you’d like a custom web application with generative AI integration, visit losangelesaiapps.com

“If you seek tranquility, do less.
— Marcus Aurelius
Most databases running software today operate on a client-server architecture. In this architecture, the server is the central system that manages data. It processes requests from and sends responses to clients. Clients here refer to users or applications that interact with the database through the server.
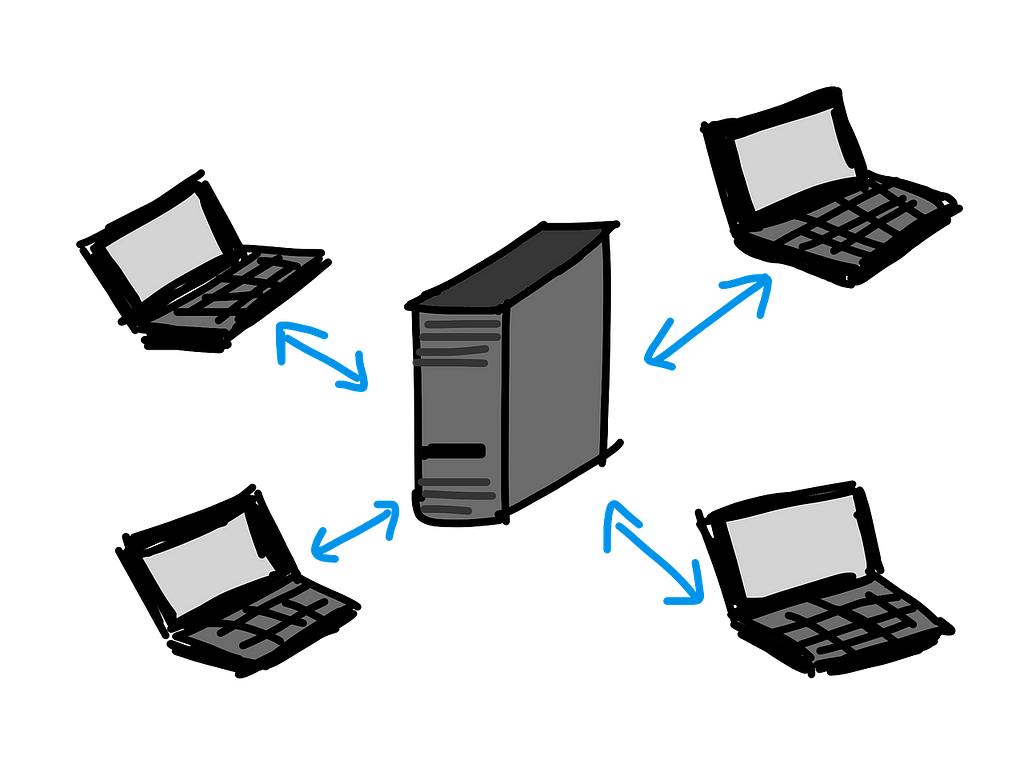
A simple way to understand this architecture is to use the analogy of libraries. The server is the library, each piece of data is a book, and the client is a visitor. In this world, visitors don’t pick books out directly from the shelves. They instead must go through the librarian, who has meticulously organized their library to make it easy to find a book. In this world, a visitor’s access to the library is mediated entirely through the library’s staff (server-side).
This is a pretty neat architecture. However, for smaller, lightweight applications it is engineering overkill. If you only have a few books, why do you need to build multiple shelves, let alone multiple rooms? The alternative to the client-server architecture is the single-file architecture used by the SQLite database.
For the uninitiated, SQLite is the Platonic ideal of databases. As opposed to running an entire server to manage the access to data, this database is housed entirely within a single file. Your application is then able to create, read, update, and destroy data by simply modifying this one file. When you deploy a web application backed by a client-server database, you are deploying not one service but two services: one for your application and one for your database. With SQLite, you only have to deploy a single service: your application with the SQLite file included. This means less complexity and less cost.
Returning to our analogy, using SQLite is like having a single notebook in which all of your data is stored. No shelves, no libraries, no librarians. You just open the book and add, delete, or update your data. Perhaps you can get fancy, and add an index in the back of your book to speed up search. You can imagine how much simpler this would be.
However, as they say in economics: there are no solutions, there are only trade-offs. SQLite is not perfect, and there are valid reasons for why it has rarely seen usage in production. In this article, I will highlight some of the issues that have dogged SQLite and how recent advancements have removed these barriers.
The primary issue in SQLite has traditionally been concurrency related. SQLite uses a write lock to ensure that only one write operation occurs at a time. We don’t want transactions interfering with each other. If you attempt to send concurrent write requests, you will often get a SQLITE_BUSY error, and one of the transactions will have been lost. In the case of concurrent requests, we want the transactions to queue up and play nice with each other.
Unfortunately, the default transaction mode in SQLite does not facilitate this. Some important background: a transaction typically involves a series of database statements, such as reads and writes, that are executed together.
-- An example transaction
BEGIN DEFERRED TRANSACTION;
SELECT * FROM inventory WHERE id = 1; -- Statement 1
UPDATE inventory SET stock = stock + 1 WHERE id = 1; -- Statement 2
The default transaction mode in SQLite is the deferred transaction mode. In this mode:
As an example, take a look at the following two transactions. Suppose they were to run at the same time:
-- Transaction 1
BEGIN DEFERRED TRANSACTION;
SELECT * FROM inventory WHERE id = 1;
UPDATE inventory SET stock = stock + 1 WHERE id = 1;

-- Transcation 2
BEGIN DEFERRED TRANSACTION;
UPDATE inventory SET stock = stock - 1 WHERE id = 1;

-- Example sequence of events:
  -- Transaction 1 begins
    -- SELECT statement: No lock is acquired yet.
  -- Transaction 2 begins
    -- Acquires a write lock (UPDATE statement).
  -- Transcation 1 continues
    -- Tries to acquire a write lock (UPDATE statement).
    -- Fails because Transaction 2 already committed and released the lock.
    -- SQLite throws SQLITE_BUSY.
  -- Transaction 2 commits successfully. Transaction 1 has failed.
In this scenario, because Transaction 1 was mid-transaction when the SQLITE_BUSY exception was thrown, it will not be re-queued after Transaction 2 is finished with the write lock; it will just be cancelled. SQLite doesn’t want to risk inconsistent results should another transaction modify overlapping data during the lock wait, so it just tells the interrupted transaction to buzz off.
Think of it this way: imagine you and your friend are sharing a notebook. You start reading a half-finished story in the notebook, planning to write the next part. But before you can pick up your pen, your friend snatches the notebook. “You weren’t writing anything anyway!” they exclaim. What if they change something crucial in your story? Frustrated and unable to continue, you give up in a huff, abandoning your attempt to finish the story. Turns out, your friend isn’t as nice as you thought!
How can we fix this issue? What if you establish the following rule: when one of you grabs the notebook, regardless of if you are reading or writing, that person gets to use the notebook until they are done? Issue solved!
This transaction mode in SQLite is known as immediate. Now, when one transaction begins, regardless of whether it is writing or reading, it claims the write lock. If a concurrent transaction attempts to claim the write lock, it will now queue up nicely behind the current one instead of throwing the SQLITE_BUSY .
Using the immediate transaction mode goes a long way towards solving the concurrency issue in SQLite. To continue improving concurrency, we can also change the journal mode. The default here is a rollback journal. In this paradigm, the original content of a database page is copied before modification. This way, if the transaction fails or if you so desire, you can always go back to the journal to restore the database to its original state. This is great for reproducibility, but bad for concurrency. Copying an entire page in a database is slow and grabs the write lock, delaying any read operations.
To fix this issue we can instead use write-ahead logging (WAL). Rather than writing changes directly to the main database file, the changes are first recorded in a separate log file (the “write-ahead log”) before being applied to the database at regular intervals. Readers can still access the most recently committed write operations, as SQLite checks the WAL file in addition to the main database file on read. This separates write and read operations, easing concurrency issues that can come as a result of scaling.
To continue our analogy, write-ahead logging is like grabbing a post-it-note every time a change to the shared notebook needs to occur. If anyone wants to read a section of the notebook, they can check if there are any post-its attached to that section to get the latest updates. You can have many people simultaneously reading the notebook at the same time with this method. Once a lot of post-its start to accumulate, you can then edit the actual notebook itself, tossing the post-its once the edits have finished.
These configuration options in SQLite have been around for decades (write-ahead-logging was introduced in 2010). Given this, why hasn’t SQLite been used in production for decades? That leads us to our next issue.
Hard disk drives (HDD) are notoriously slow compared to solid state drives (SSD) on a variety of operations that are important to database management. For example, SSDs are about 100 times faster than HDDs when it comes to latency (time it takes for a single I/O operation). In random I/O operations per second (IOPS), SSDs are about 50–1000 times faster than HDDs. SSDs are so much faster than HDDs because of the lack of moving parts. HDDs use spinning disks and moving parts to read and write data, much like an old turntable, whereas SDDs use only electronic components, much like a giant USB stick.
Despite their inferiority, HDDs have historically dominated the storage market primarily due to low cost. However, SDDs have quickly been catching up. In 2011, SSDs were roughly 32 times more expensive per GB than HDDs (source). By 2023, the price gap narrowed, with SSDs now being about 3 to 5 times more expensive per GB compared to HDDs (source). In the past year, SSD prices have increased due to cuts from manufacturers like Samsung and increasing demand in data centers. In the long run however, we can expect SSDs to continue to decrease in price. Even if parity is never reached with HDDs, the low absolute price is enough to ensure widespread adoption. In 2020, SSDs outsold HDDs, with 333 million units shipped compared to 260 million HDDs, marking a turning point in the storage market (source).
As of December 2024, you can rent a dedicated vCPU with 80 GB of SSD storage for about $16 USD per month on a service like Hetzner. 240 GB can be had for about $61. You can get even cheaper prices with a shared vCPU. For many smaller applications this storage is more than enough. The use of cheap SSDs has removed a significant bottleneck when using SQLite in production-grade applications. But there is still one more important issue to deal with.
It goes without saying that having a backup to your database is critical in production. The last thing any startup wants is to have their primary database get corrupted and all user data lost.
The first option for creating a backup is the simplest. Since the SQLite database is just a file, you can essentially copy and paste your database into a folder on your computer, or upload it to a cloud service like AWS S3 buckets for more reliability. For small databases with infrequent writes this is a great option. As a simple example (taken from the Litestream docs), here is a bash script creating a backup:
#!/bin/bash

# Ensure script stops when commands fail.
set -e

# Backup our database to the temp directory.
sqlite3 /path/to/db "VACUUM INTO '/path/to/backup'"

# Compress the backup file for more efficient storage
gzip /tmp/db

# Upload backup to S3 using a rolling daily naming scheme.
aws s3 cp /tmp/db.gz s3://mybucket/db-`date +%d`.gz
A few notes:
If you want to have your backups run automatically, you can configure crontab to run this job on a regular basis. Here we are running the script daily at midnight:
# Edit your cron jobs
crontab -e

# Add this to the end of the crontab
0 0 * * * /path/to/my_backup_script.sh
For write-heavy databases, where you would want to capture the state of the database at any given moment, you can use Litestream. This is an open-source tool designed to provide real-time replication for SQLite databases by streaming changes to a remote storage backend.
Litestream is able to track changes to SQLite’s WAL file. Remember the post-it notes? Whenever a new transaction is recorded to the WAL file, Litestream is able to replicate these incrementally to your cloud storage provider of choice. This allows us to maintain a near real-time backup of the database without creating full copies each time.
To get started with Litestream, you first have to install it. On MacOS this means using Homebrew. Then, you need to setup a litestream.yml configuration file:
# /etc/litestream.yml
dbs:
  - path: /path/to/your.db
    replicas:
      - type: s3
        bucket: your-s3-bucket-name
        path: your-database-name
        region: your-region
Here, we are going to be streaming transactions to our database to an S3 bucket. Then we can run the following command to begin replication:
litestream replicate -config /etc/litestream.yml
In this case, we are setting any transactions in your.db to be replicated in an S3 bucket. That’s it! You are then able to restore a SQLite database to any previous state by replaying WAL changes. As an example, if you want to create a copy of your db called restored.db from a timestamp of 15:00 UTC dated 2024–12–10, you can run the following command:
litestream restore -o /path/to/restored.db
  -timestamp "2024-12-10T15:00:00Z"
  s3://your-s3-bucket-name/your-database-name
To get a backup of the latest version of your database, just omit the -timestamp flag .
I encourage you to watch this recent talk at Rails World 2024 to see how SQLite is rapidly becoming production-ready. They have implemented some of the changes we have discussed here to their SQLite adapter. I also recommend reading Stephen Margheim’s article detailing his work on SQLite in Rails if you want to dive deeper. You better believe these sorts of improvement are coming soon to Django, Laravel, etc.
The improvements to SQLite for production are not finished. David Heinemeier Hansson, creator of Rails, wants to push SQLite to be able to run a mid-size SaaS company off of. Exciting times!
SQLite in Production: Dreams Becoming Reality was originally published in Towards Data Science on Medium, where people are continuing the conversation by highlighting and responding to this story.
Originally appeared here:
SQLite in Production: Dreams Becoming Reality
Go Here to Read this Fast! SQLite in Production: Dreams Becoming Reality
Feeling inspired to write your first TDS post before the end of 2024? We’re always open to contributions from new authors.
Our guiding principle is that it’s never a bad time to learn new things, but we also know that different moments call for different types of learning. Here at TDS, we’ve traditionally published lots of hands-on, roll-up-your-sleeves guides and tutorials as soon as we kick off a new year—and we’re sure that will be the case come January 2025, too.
For now, as we enter the peak of the holiday season, we wanted to highlight some of our best recent articles that call for a bit more reflection and a slower pace of processing: stories you can savor as you lounge on a comfy armchair, say, rather than while typing code away on your laptop (though you can do that too, of course; we won’t hold it against you!).
From the cultural impact of AI-generated content to a Bayesian analysis of dogs’ pooping habits (yes, you’ve read that right), we hope you enjoy this lineup of thought-provoking, engaging articles. And stay tuned: we can’t wait to share our 2024 highlights with you in next week’s final-edition-of-the-year Variable.

Thank you for supporting the work of our authors! As we mentioned above, we love publishing articles from new authors, so if you’ve recently written an interesting project walkthrough, tutorial, or theoretical reflection on any of our core topics, don’t hesitate to share it with us.
Until the next Variable,
TDS Team
The Economics of Artificial Intelligence, Causal Tools, ChatGPT’s Impact, and Other Holiday Reads was originally published in Towards Data Science on Medium, where people are continuing the conversation by highlighting and responding to this story.
Originally appeared here:
The Economics of Artificial Intelligence, Causal Tools, ChatGPT’s Impact, and Other Holiday Reads