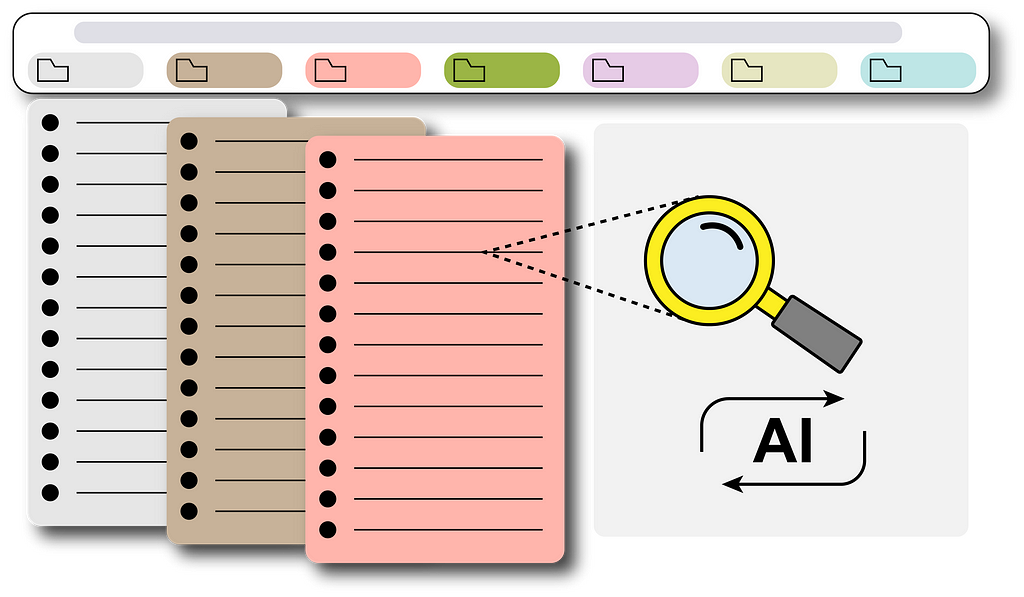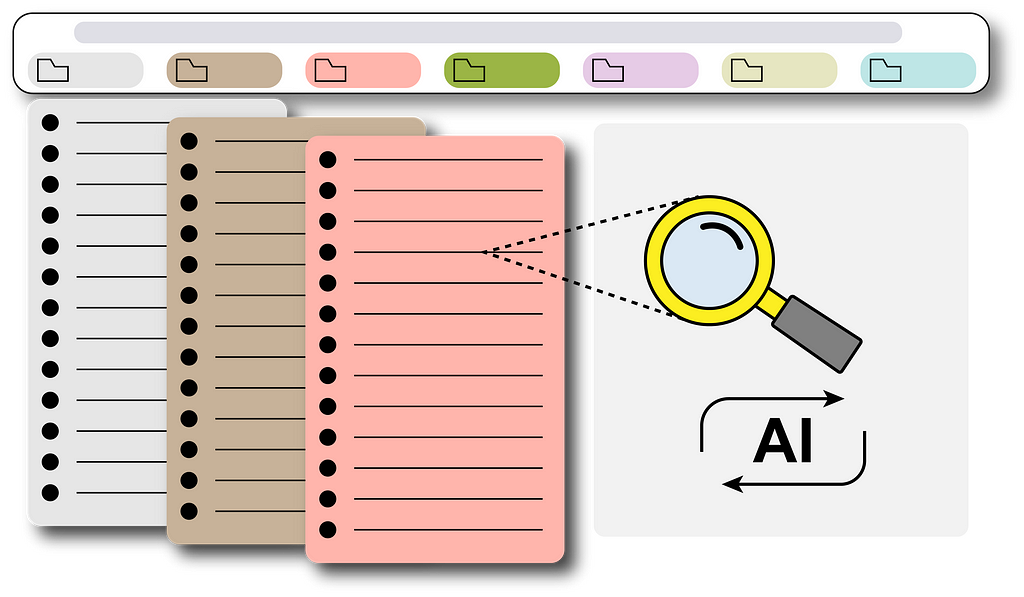
A step-by-step guide for an automated GPT-based bookmark searching pipeline

Have you encountered moments when searching for a specific bookmark in your Chrome browser only to find that you’re overwhelmed by their sheer number? It becomes quite tedious and draining to sift through your extensive collection of bookmarks.
Actually, we can simply leave it to ChatGPT which is currently the most popular AI model that can basically answer everything we ask. Imagine, if it can gain access to the bookmarks we have, then bingo! Problem solved! We can then ask it to give us the specific link we want from the entire bookmark storage, like the following GIF:
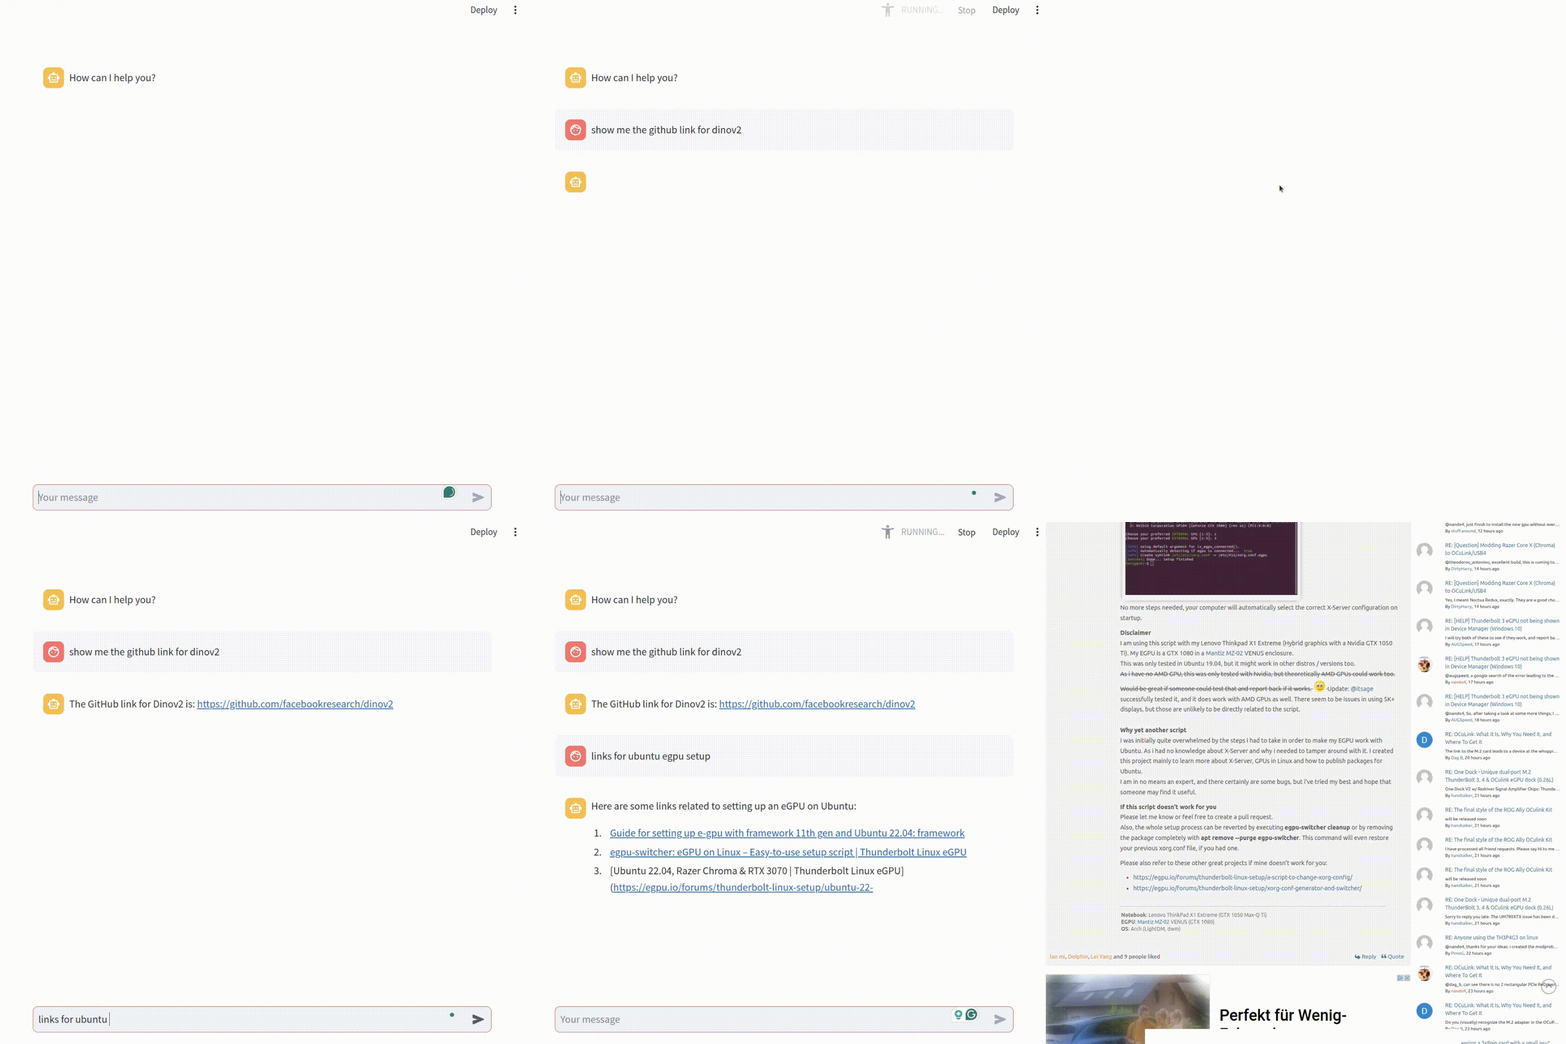
To achieve this, I built a real-time pipeline to update the Chrome bookmarks into a vector database that ChatGPT will use as the context for our questions. I will explain in this article step by step how to build such a pipeline and you will eventually have your own one too!
Features
Before we begin, let’s count the advantages of it:
- Unlike traditional search engines (like the one in Chrome bookmark manager), AI models can have a good semantic understanding of each title. If you forget the exact keyword when searching bookmarks, you can simply draw a rough outline and ChatGPT can get it! It can even understand titles in a different language. Truly remarkable.
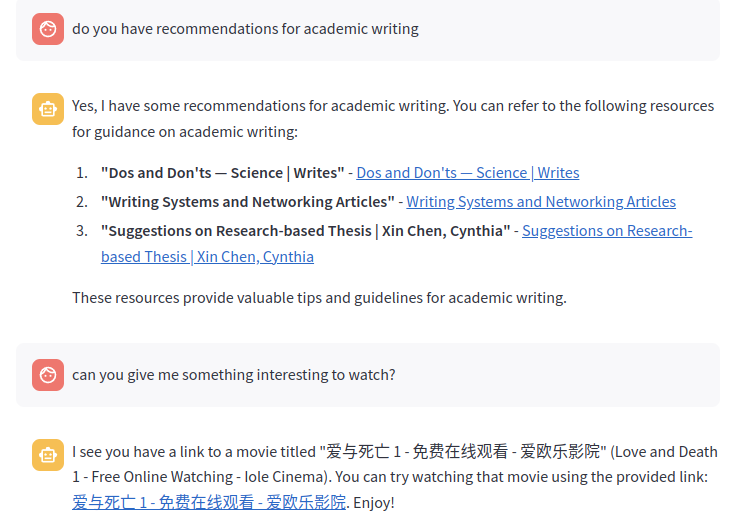
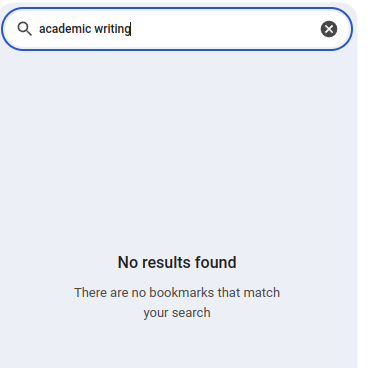
2. Everything is automatically up-to-date. Each newly added bookmark will be automatically reflected in the AI knowledge database simply within a few minutes.
Pipeline Overview

Here you can see the role of each component in our pipeline. The Chrome bookmarks are extracted into rows of a Google Sheet using our customized Chrome plugin. The Estuary Flow gets (or captures) all the sheet data which will then be vectorized (or materialized) by an embedding model using OpenAI API. All the embeddings (each vector corresponds to each row of the sheet — i.e. each single bookmark) will be retrieved and stored in the Pinecone vector database. After that, the user can give prompts to the built app using Streamlit and LangChain (e.g. “Are there links for dinov2?”). It will first retrieve some similar embeddings from Pinecone (getting a context/several potential bookmark options) and combine them with the user’s question as input to ChatGPT. Then ChatGPT will consider every possible bookmark and give a final answer to you. This process is also called RAG: Retrieval Augmented Generation.
In the following parts, we will see how to build such a pipeline step by step.
Chrome Plugin for bookmark retrieval
Code: https://github.com/swsychen/Boomark2Sheet_Chromeplugin
To transport bookmarks into a Google Sheet for further processing, we need to build a customized Chrome plugin (or extension) first.
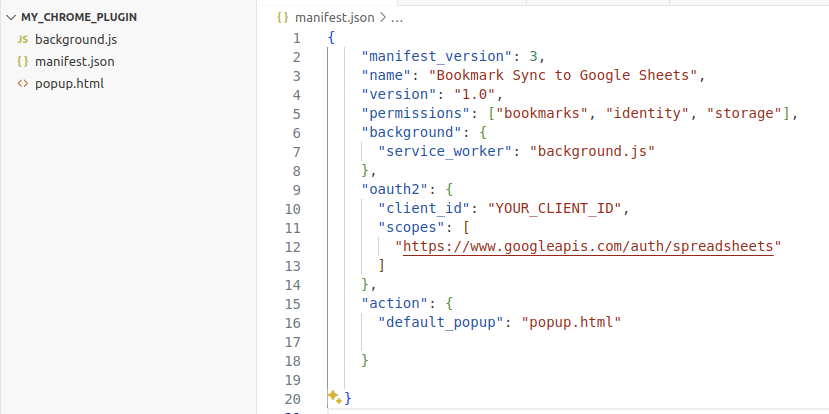
The most important file for a Chrome extension is the manifest.json, which defines the high-level structure and behavior of the plugin. Here we add the necessary permissions to use the bookmark API from Google Chrome and track the changes in the bookmarks. We also have a field for oauth2 authentication because we will use the Google Sheet API. You will need to put your own client_id in this field. You can mainly follow the Set up your environment section in this link to get the client_id and a Google Sheet API key (we will use it later). Something you should notice is:
- In OAuth consent screen, you need to add yourself (Gmail address) as the test user. Otherwise, you will not be allowed to use the APIs.
- In Create OAuth client ID, the application type you should choose is Chrome extension (not the Web application as in the quickstart link). The Item ID needed to be specified is the plugin ID (we will have it when we load our plugin and you can find it in the extension manager).
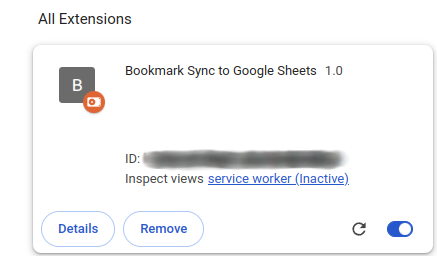
The core functional file is background.js, which can do all the syncs in the background. I’ve prepared the code for you in the GitHub link, the only thing you need to change is the spreadsheetId at the start of the javascript file. This id you can identify it in the sharing link of your created Google Sheet (after d/ and before /edit, and yes you need to manually create a Google Sheet first!):
https://docs.google.com/spreadsheets/d/{spreadsheetId}/edit#gid=0
The main logic of the code is to listen to any change in your bookmarks and refresh (clear + write) your Sheet file with all the bookmarks you have when the plugin is triggered (e.g. when you add a new bookmark). It writes the id, title, and URL of each bookmark into a separate row in your specified Google Sheet.

The last file popup.html is basically not that useful as it only defines the content it shows in the popup window when you click the plugin button in your Chrome browser.
After you make sure all the files are in a single folder, now you are ready to upload your plugin:
- Go to the Extensions>Manage Extensions of your Chrome browser, and turn on the Developer mode on the top right of the page.
- Click the Load unpacked and choose the code folder. Then your plugin will be uploaded and running. Click the hyperlink service worker to see the printed log info from the code.
Once uploaded, the plugin will stay operational as long as the Chrome browser is open. And it’ll also automatically start running when you re-open the browser.
Setting up Estuary Flow and Pinecone
Estuary Flow is basically a connector that syncs the database with the data source you provided. In our case, when Estuary Flow syncs data from a Google Sheet into a vector database — Pinecone, it will also call an embedding model to transform the data into embedding vectors which will then be stored in the Pinecone database.
For setting up Estuary Flow and Pinecone, there is already a quite comprehensive video tutorial on YouTube: https://youtu.be/qyUmVW88L_A?si=xZ-atgJortObxDi-
But please pay attention! Because the Estuary Flow and Pinecone are in fast development. Some points in the video have changed by now, which may cause confusion. Here I list some updates to the video so that you can replicate everything easily:
1.(Estuary Flow>create Capture) In row batch size, you may set some larger numbers according to the total row numbers in your Google Sheet for bookmarks. (e.g. set it to 600 if you’ve already got 400+ rows of bookmarks)
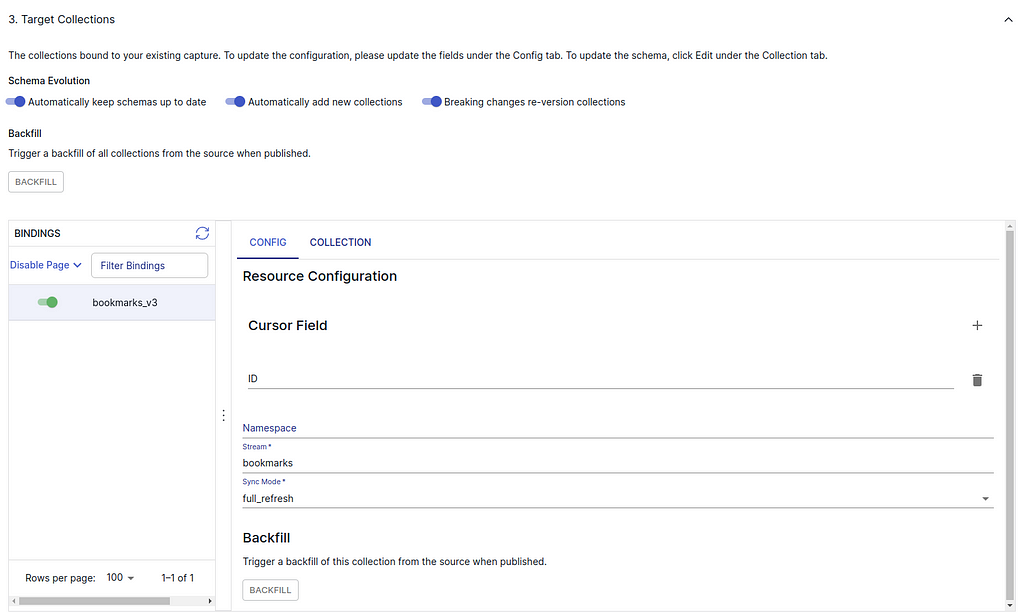
2. (Estuary Flow>create Capture) When setting Target Collections, delete the cursor field “row_id” and add a new one “ID” like the following screenshot. You can keep the namespace empty.
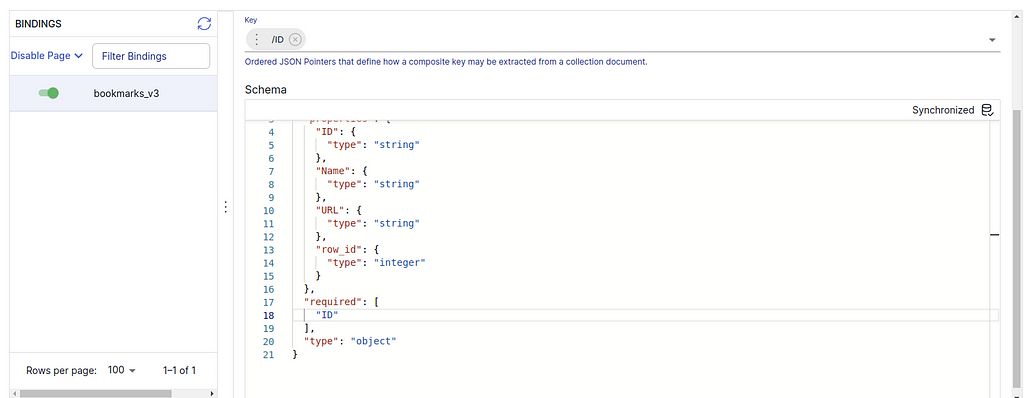
3. (Estuary Flow>create Capture) Then switch to the COLLECTION subtab, press EDIT to change the Key from /row_id to /ID. And you should also change the “required” field of the schema code to “ID” like the following:
    //...skipped
    "URL": {
      "type": "string"
    },
    "row_id": {
      "type": "integer"
    }
  },
  "required": [
    "ID"
  ],
  "type": "object"
}
After “SAVE AND PUBLISH”, you can see that Collections>{your collection name}>Overview>Data Preview will show the correct ID of each bookmark.
4. (Estuary Flow>create Capture) In the last step, you can see an Advanced Specification Editor (in the bottom of the page). Here you can add a field “interval”: 10m to decrease the refresh rate to per 10 minutes (default setting is per 5 minutes if not specified). Each refresh will call the OpenAI embedding model to redo all the embedding which will cost some money. Decreasing the rate is to save half of the money. You can ignore the “backfill” field.

        //...skipped
        "syncMode": "full_refresh"
      },
      "target": "CJQ/mybookmark/bookmarks_v3"
    }
  ],
  "interval": "10m"
}
5. (Estuary Flow>create Materialization) The Pinecone environment is typically “gcp-starter” for a free-tier Pinecone index or like “us-east-1-aws” for standard-plan users (I don’t use serverless mode in Pinecone because the Estuary Flow has not yet provided a connector for the Pinecone serverless mode). The Pinecone index is the index name when you create the index in Pinecone.
6. (Estuary Flow>create Materialization) Here are some tricky parts.
- First, you should select the source capture using the blue button “SOURCE FROM CAPTURE” and then leave the Pinecone namespace in “CONFIG” EMPTY (the free tier of Pinecone must have an empty namespace).
- Second, after pressing “NEXT”, in the emerged Advanced Specification Editor of the materialization, you must make sure that the “bindings” field is NOT EMPTY. Fill in the content as in the following screenshot if it is empty or the field does not exist, otherwise, it won’t send anything to Pinecone. Also, you need to change the “source” field using your own Collection path (same as the “target” in the previous screenshot). If some errors pop up after you press “NEXT” and before you can see the editor, press “NEXT” again, and you will see the Advanced Specification Editor. Then you can specify the “bindings” and press “SAVE AND PUBLISH”. Everything should be ok after this step. The errors occur because we didn’t specify the “bindings” before.
- If there is another error message coming up after you have published everything and just returned to the Destination page telling you that you have not added a collection, simply ignore it as long as you see the usage is not zero in the OVERVIEW histogram (see the following screenshots). The histogram basically means how much data it has sent to Pinecone.

"bindings": [
    {
      "resource": {},
      "source": "CJQ/mybookmark/bookmarks_v3",
      "fields": {
        "recommended": true
      }
    }
  ],


7. (Pinecone>create index) Pinecone has come up with serverless index mode (free but not supported by Estuary Flow yet) but I don’t use it in this project. Here we still use the pod-based option (not free anymore since last checked on April 14, 2024) which is well enough for our bookmark embedding storage. When creating an index, all you need is to set the index name and dimensions.
8. (Pinecone>Indexes>{Your index}) After you finish the creation of the Pinecone index and make sure the index name and environment are filled in correctly in the materialization of Estuary Flow, you are set. In the Pincone console, go to Indexes>{Your index} and you should see the vector count showing the total number of your bookmarks. It may take a few minutes until the Pinecone receives information from Estuary Flow and shows the correct vector count.

Building your own App with Streamlit and Langchain
Code: https://github.com/swsychen/BookmarkAI_App
We are almost there! The last step is to build a beautiful interface just like the original ChatGPT. Here we use a very convenient framework called Streamlit, with which we can build an app in only a few lines of code. Langchain is also a user-friendly framework for using any large language model with minimum code.
I’ve also prepared the code for this App for you. Follow the installation and usage guide in the GitHub link and enjoy!
The main logic of the code is:
get user prompt → create a retriever chain with ChatGPT and Pinecone → input the prompt to the chain and get a response → stream the result to the UI

Please notice, that because the Langchain is in development, the code may be deprecated if you use a newer version other than the stated one in requirements.txt. If you want to dig deeper into Langchain and use another LLM for this bookmark searching, feel free to look into the official documents of Langchain.
Outro
This is the first tutorial post I’ve ever written. If there is anything unclear that needs to be improved or clarified, feel free to leave messages.
How to build your own AI assistant for bookmark searching? was originally published in Towards Data Science on Medium, where people are continuing the conversation by highlighting and responding to this story.
Originally appeared here:
How to build your own AI assistant for bookmark searching?
Go Here to Read this Fast! How to build your own AI assistant for bookmark searching?
