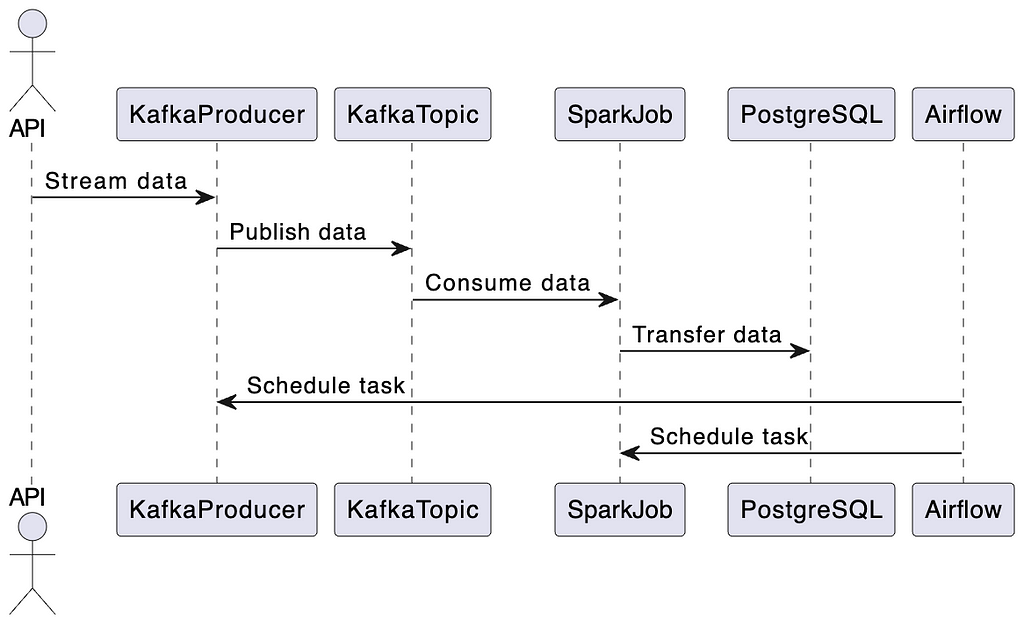
This article is part of a project that’s split into two main phases. The first phase focuses on building a data pipeline. This involves getting data from an API and storing it in a PostgreSQL database. In the second phase, we’ll develop an application that uses a language model to interact with this database.
Ideal for those new to data systems or language model applications, this project is structured into two segments:
- This initial article guides you through constructing a data pipeline utilizing Kafka for streaming, Airflow for orchestration, Spark for data transformation, and PostgreSQL for storage. To set-up and run these tools we will use Docker.
- The second article, which will come later, will delve into creating agents using tools like LangChain to communicate with external databases.
This first part project is ideal for beginners in data engineering, as well as for data scientists and machine learning engineers looking to deepen their knowledge of the entire data handling process. Using these data engineering tools firsthand is beneficial. It helps in refining the creation and expansion of machine learning models, ensuring they perform effectively in practical settings.
This article focuses more on practical application rather than theoretical aspects of the tools discussed. For detailed understanding of how these tools work internally, there are many excellent resources available online.
Overview
Let’s break down the data pipeline process step-by-step:
- Data Streaming: Initially, data is streamed from the API into a Kafka topic.
- Data Processing: A Spark job then takes over, consuming the data from the Kafka topic and transferring it to a PostgreSQL database.
- Scheduling with Airflow: Both the streaming task and the Spark job are orchestrated using Airflow. While in a real-world scenario, the Kafka producer would constantly listen to the API, for demonstration purposes, we’ll schedule the Kafka streaming task to run daily. Once the streaming is complete, the Spark job processes the data, making it ready for use by the LLM application.
All of these tools will be built and run using docker, and more specifically docker-compose.

Now that we have a blueprint of our pipeline, let’s dive into the technical details !
Local setup
First you can clone the Github repo on your local machine using the following command:
git clone https://github.com/HamzaG737/data-engineering-project.git
Here is the overall structure of the project:
├── LICENSE
├── README.md
├── airflow
│   ├── Dockerfile
│   ├── __init__.py
│   └── dags
│       ├── __init__.py
│       └── dag_kafka_spark.py
├── data
│   └── last_processed.json
├── docker-compose-airflow.yaml
├── docker-compose.yml
├── kafka
├── requirements.txt
├── spark
│   └── Dockerfile
└── src
    ├── __init__.py
    ├── constants.py
    ├── kafka_client
    │   ├── __init__.py
    │   └── kafka_stream_data.py
    └── spark_pgsql
        └── spark_streaming.py
- The airflow directory contains a custom Dockerfile for setting up airflow and a dags directory to create and schedule the tasks.
- The data directory contains the last_processed.json file which is crucial for the Kafka streaming task. Further details on its role will be provided in the Kafka section.
- The docker-compose-airflow.yaml file defines all the services required to run airflow.
- The docker-compose.yaml file specifies the Kafka services and includes a docker-proxy. This proxy is essential for executing Spark jobs through a docker-operator in Airflow, a concept that will be elaborated on later.
- The spark directory contains a custom Dockerfile for spark setup.
- src contains the python modules needed to run the application.
To set up your local development environment, start by installing the required Python packages. The only essential package is psycopg2-binary. You have the option to install just this package or all the packages listed in the requirements.txt file. To install all packages, use the following command:
pip install -r requirements.txt
Next let’s dive step by step into the project details.
About the API
The API is RappelConso from the French public services. It gives access to data relating to recalls of products declared by professionals in France. The data is in French and it contains initially 31 columns (or fields). Some of the most important are:
- reference_fiche (reference sheet): Unique identifier of the recalled product. It will act as the primary key of our Postgres database later.
- categorie_de_produit (Product category): For instance food, electrical appliance, tools, transport means, etc …
- sous_categorie_de_produit (Product sub-category): For instance we can have meat, dairy products, cereals as sub-categories for the food category.
- motif_de_rappel (Reason for recall): Self explanatory and one of the most important fields.
- date_de_publication which translates to the publication date.
- risques_encourus_par_le_consommateur which contains the risks that the consumer may encounter when using the product.
- There are also several fields that correspond to different links, such as link to product image, link to the distributers list, etc..
You can see some examples and query manually the dataset records using this link.
We refined the data columns in a few key ways:
- Columns like ndeg_de_version and rappelguid, which were part of a versioning system, have been removed as they aren’t needed for our project.
- We combined columns that deal with consumer risks — risques_encourus_par_le_consommateur and description_complementaire_du_risque — for a clearer overview of product risks.
- The date_debut_fin_de_commercialisation column, which indicates the marketing period, has been divided into two separate columns. This split allows for easier queries about the start or end of a product’s marketing.
- We’ve removed accents from all columns except for links, reference numbers, and dates. This is important because some text processing tools struggle with accented characters.
For a detailed look at these changes, check out our transformation script at src/kafka_client/transformations.py. The updated list of columns is available insrc/constants.py under DB_FIELDS.
Kafka streaming
To avoid sending all the data from the API each time we run the streaming task, we define a local json file that contains the last publication date of the latest streaming. Then we will use this date as the starting date for our new streaming task.
To give an example, suppose that the latest recalled product has a publication date of 22 november 2023. If we make the hypothesis that all of the recalled products infos before this date are already persisted in our Postgres database, We can now stream the data starting from the 22 november. Note that there is an overlap because we may have a scenario where we didn’t handle all of the data of the 22nd of November.
The file is saved in ./data/last_processed.json and has this format:
{last_processed:"2023-11-22"}
By default the file is an empty json which means that our first streaming task will process all of the API records which are 10 000 approximately.
Note that in a production setting this approach of storing the last processed date in a local file is not viable and other approaches involving an external database or an object storage service may be more suitable.
The code for the kafka streaming can be found on ./src/kafka_client/kafka_stream_data.py and it involves primarily querying the data from the API, making the transformations, removing potential duplicates, updating the last publication date and serving the data using the kafka producer.
The next step is to run the kafka service defined the docker-compose defined below:
version: '3'

services:
  kafka:
    image: 'bitnami/kafka:latest'
    ports:
      - '9094:9094'
    networks:
      - airflow-kafka
    environment:
      - KAFKA_CFG_NODE_ID=0
      - KAFKA_CFG_PROCESS_ROLES=controller,broker
      - KAFKA_CFG_LISTENERS=PLAINTEXT://:9092,CONTROLLER://:9093,EXTERNAL://:9094
      - KAFKA_CFG_ADVERTISED_LISTENERS=PLAINTEXT://kafka:9092,EXTERNAL://localhost:9094
      - KAFKA_CFG_LISTENER_SECURITY_PROTOCOL_MAP=CONTROLLER:PLAINTEXT,EXTERNAL:PLAINTEXT,PLAINTEXT:PLAINTEXT
      - KAFKA_CFG_CONTROLLER_QUORUM_VOTERS=0@kafka:9093
      - KAFKA_CFG_CONTROLLER_LISTENER_NAMES=CONTROLLER
    volumes:
      - ./kafka:/bitnami/kafka

  kafka-ui:
    container_name: kafka-ui-1
    image: provectuslabs/kafka-ui:latest
    ports:
      - 8800:8080
    depends_on:
      - kafka
    environment:
      KAFKA_CLUSTERS_0_NAME: local
      KAFKA_CLUSTERS_0_BOOTSTRAPSERVERS: PLAINTEXT://kafka:9092
      DYNAMIC_CONFIG_ENABLED: 'true'
    networks:
      - airflow-kafka


networks:
  airflow-kafka:
    external: true
The key highlights from this file are:
- The kafka service uses a base image bitnami/kafka.
- We configure the service with only one broker which is enough for our small project. A Kafka broker is responsible for receiving messages from producers (which are the sources of data), storing these messages, and delivering them to consumers (which are the sinks or end-users of the data). The broker listens to port 9092 for internal communication within the cluster and port 9094 for external communication, allowing clients outside the Docker network to connect to the Kafka broker.
- In the volumes part, we map the local directory kafka to the docker container directory /bitnami/kafka to ensure data persistence and a possible inspection of Kafka’s data from the host system.
- We set-up the service kafka-ui that uses the docker image provectuslabs/kafka-ui:latest . This provides a user interface to interact with the Kafka cluster. This is especially useful for monitoring and managing Kafka topics and messages.
- To ensure communication between kafka and airflow which will be run as an external service, we will use an external network airflow-kafka.
Before running the kafka service, let’s create the airflow-kafka network using the following command:
docker network create airflow-kafka
Now everything is set to finally start our kafka service
docker-compose up
After the services start, visit the kafka-ui at http://localhost:8800/. Normally you should get something like this:
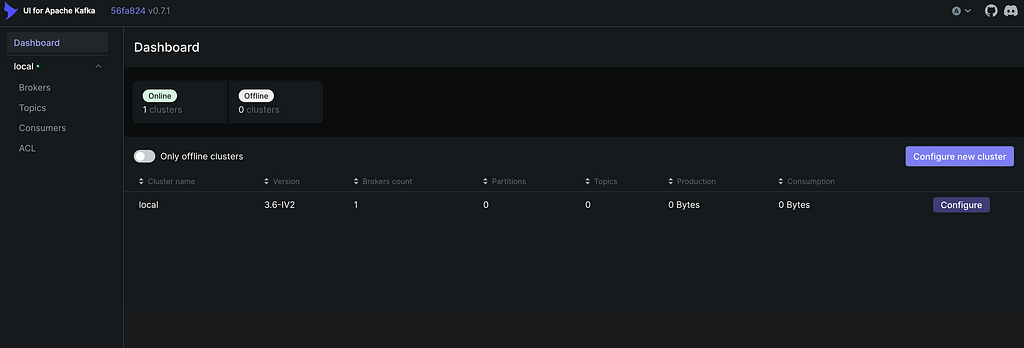
Next we will create our topic that will contain the API messages. Click on Topics on the left and then Add a topic at the top left. Our topic will be called rappel_conso and since we have only one broker we set the replication factor to 1. We will also set the partitions number to 1 since we will have only one consumer thread at a time so we won’t need any parallelism. Finally, we can set the time to retain data to a small number like one hour since we will run the spark job right after the kafka streaming task, so we won’t need to retain the data for a long time in the kafka topic.
Postgres set-up
Before setting-up our spark and airflow configurations, let’s create the Postgres database that will persist our API data. I used the pgadmin 4 tool for this task, however any other Postgres development platform can do the job.
To install postgres and pgadmin, visit this link https://www.postgresql.org/download/ and get the packages following your operating system. Then when installing postgres, you need to setup a password that we will need later to connect to the database from the spark environment. You can also leave the port at 5432.
If your installation has succeeded, you can start pgadmin and you should observe something like this window:
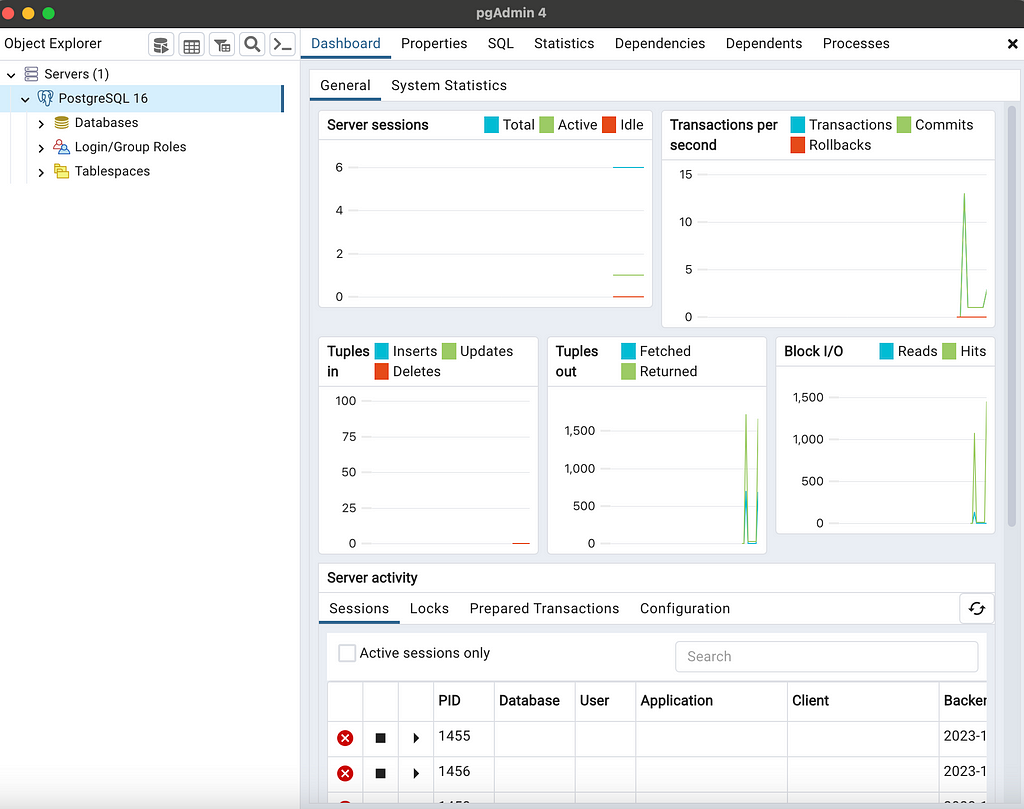
Since we have a lot of columns for the table we want to create, we chose to create the table and add its columns with a script using psycopg2, a PostgreSQL database adapter for Python.
You can run the script with the command:
python scripts/create_table.py
Note that in the script I saved the postgres password as environment variable and name it POSTGRES_PASSWORD. So if you use another method to access the password you need to modify the script accordingly.
Spark Set-up
Having set-up our Postgres database, let’s delve into the details of the spark job. The goal is to stream the data from the Kafka topic rappel_conso to the Postgres table rappel_conso_table.
from pyspark.sql import SparkSession
from pyspark.sql.types import (
    StructType,
    StructField,
    StringType,
)
from pyspark.sql.functions import from_json, col
from src.constants import POSTGRES_URL, POSTGRES_PROPERTIES, DB_FIELDS
import logging


logging.basicConfig(
    level=logging.INFO, format="%(asctime)s:%(funcName)s:%(levelname)s:%(message)s"
)


def create_spark_session() -> SparkSession:
    spark = (
        SparkSession.builder.appName("PostgreSQL Connection with PySpark")
        .config(
            "spark.jars.packages",
            "org.postgresql:postgresql:42.5.4,org.apache.spark:spark-sql-kafka-0-10_2.12:3.5.0",

        )
        .getOrCreate()
    )

    logging.info("Spark session created successfully")
    return spark


def create_initial_dataframe(spark_session):
    """
    Reads the streaming data and creates the initial dataframe accordingly.
    """
    try:
        # Gets the streaming data from topic random_names
        df = (
            spark_session.readStream.format("kafka")
            .option("kafka.bootstrap.servers", "kafka:9092")
            .option("subscribe", "rappel_conso")
            .option("startingOffsets", "earliest")
            .load()
        )
        logging.info("Initial dataframe created successfully")
    except Exception as e:
        logging.warning(f"Initial dataframe couldn't be created due to exception: {e}")
        raise

    return df


def create_final_dataframe(df):
    """
    Modifies the initial dataframe, and creates the final dataframe.
    """
    schema = StructType(
        [StructField(field_name, StringType(), True) for field_name in DB_FIELDS]
    )
    df_out = (
        df.selectExpr("CAST(value AS STRING)")
        .select(from_json(col("value"), schema).alias("data"))
        .select("data.*")
    )
    return df_out


def start_streaming(df_parsed, spark):
    """
    Starts the streaming to table spark_streaming.rappel_conso in postgres
    """
    # Read existing data from PostgreSQL
    existing_data_df = spark.read.jdbc(
        POSTGRES_URL, "rappel_conso", properties=POSTGRES_PROPERTIES
    )

    unique_column = "reference_fiche"

    logging.info("Start streaming ...")
    query = df_parsed.writeStream.foreachBatch(
        lambda batch_df, _: (
            batch_df.join(
                existing_data_df, batch_df[unique_column] == existing_data_df[unique_column], "leftanti"
            )
            .write.jdbc(
                POSTGRES_URL, "rappel_conso", "append", properties=POSTGRES_PROPERTIES
            )
        )
    ).trigger(once=True)
        .start()

    return query.awaitTermination()


def write_to_postgres():
    spark = create_spark_session()
    df = create_initial_dataframe(spark)
    df_final = create_final_dataframe(df)
    start_streaming(df_final, spark=spark)


if __name__ == "__main__":
    write_to_postgres()
Let’s break down the key highlights and functionalities of the spark job:
- First we create the Spark session
def create_spark_session() -> SparkSession:
    spark = (
        SparkSession.builder.appName("PostgreSQL Connection with PySpark")
        .config(
            "spark.jars.packages",
            "org.postgresql:postgresql:42.5.4,org.apache.spark:spark-sql-kafka-0-10_2.12:3.5.0",

        )
        .getOrCreate()
    )

    logging.info("Spark session created successfully")
    return spark
2. The create_initial_dataframe function ingests streaming data from the Kafka topic using Spark’s structured streaming.
def create_initial_dataframe(spark_session):
    """
    Reads the streaming data and creates the initial dataframe accordingly.
    """
    try:
        # Gets the streaming data from topic random_names
        df = (
            spark_session.readStream.format("kafka")
            .option("kafka.bootstrap.servers", "kafka:9092")
            .option("subscribe", "rappel_conso")
            .option("startingOffsets", "earliest")
            .load()
        )
        logging.info("Initial dataframe created successfully")
    except Exception as e:
        logging.warning(f"Initial dataframe couldn't be created due to exception: {e}")
        raise

    return df
3. Once the data is ingested, create_final_dataframe transforms it. It applies a schema (defined by the columns DB_FIELDS) to the incoming JSON data, ensuring that the data is structured and ready for further processing.
def create_final_dataframe(df):
    """
    Modifies the initial dataframe, and creates the final dataframe.
    """
    schema = StructType(
        [StructField(field_name, StringType(), True) for field_name in DB_FIELDS]
    )
    df_out = (
        df.selectExpr("CAST(value AS STRING)")
        .select(from_json(col("value"), schema).alias("data"))
        .select("data.*")
    )
    return df_out
4. The start_streaming function reads existing data from the database, compares it with the incoming stream, and appends new records.
def start_streaming(df_parsed, spark):
    """
    Starts the streaming to table spark_streaming.rappel_conso in postgres
    """
    # Read existing data from PostgreSQL
    existing_data_df = spark.read.jdbc(
        POSTGRES_URL, "rappel_conso", properties=POSTGRES_PROPERTIES
    )

    unique_column = "reference_fiche"

    logging.info("Start streaming ...")
    query = df_parsed.writeStream.foreachBatch(
        lambda batch_df, _: (
            batch_df.join(
                existing_data_df, batch_df[unique_column] == existing_data_df[unique_column], "leftanti"
            )
            .write.jdbc(
                POSTGRES_URL, "rappel_conso", "append", properties=POSTGRES_PROPERTIES
            )
        )
    ).trigger(once=True)
        .start()

    return query.awaitTermination()
The complete code for the Spark job is in the file src/spark_pgsql/spark_streaming.py. We will use the Airflow DockerOperator to run this job, as explained in the upcoming section.
Let’s go through the process of creating the Docker image we need to run our Spark job. Here’s the Dockerfile for reference:
FROM bitnami/spark:latest


WORKDIR /opt/bitnami/spark

RUN pip install py4j


COPY ./src/spark_pgsql/spark_streaming.py ./spark_streaming.py
COPY ./src/constants.py ./src/constants.py

ENV POSTGRES_DOCKER_USER=host.docker.internal
ARG POSTGRES_PASSWORD
ENV POSTGRES_PASSWORD=$POSTGRES_PASSWORD
In this Dockerfile, we start with the bitnami/spark image as our base. It’s a ready-to-use Spark image. We then install py4j, a tool needed for Spark to work with Python.
The environment variables POSTGRES_DOCKER_USER and POSTGRES_PASSWORD are set up for connecting to a PostgreSQL database. Since our database is on the host machine, we use host.docker.internal as the user. This allows our Docker container to access services on the host, in this case, the PostgreSQL database. The password for PostgreSQL is passed as a build argument, so it’s not hard-coded into the image.
It’s important to note that this approach, especially passing the database password at build time, might not be secure for production environments. It could potentially expose sensitive information. In such cases, more secure methods like Docker BuildKit should be considered.
Now, let’s build the Docker image for Spark:
docker build -f spark/Dockerfile -t rappel-conso/spark:latest --build-arg POSTGRES_PASSWORD=$POSTGRES_PASSWORD .
This command will build the image rappel-conso/spark:latest . This image includes everything needed to run our Spark job and will be used by Airflow’s DockerOperator to execute the job. Remember to replace $POSTGRES_PASSWORD with your actual PostgreSQL password when running this command.
Airflow
As said earlier, Apache Airflow serves as the orchestration tool in the data pipeline. It is responsible for scheduling and managing the workflow of the tasks, ensuring they are executed in a specified order and under defined conditions. In our system, Airflow is used to automate the data flow from streaming with Kafka to processing with Spark.
Airflow DAG
Let’s take a look at the Directed Acyclic Graph (DAG) that will outline the sequence and dependencies of tasks, enabling Airflow to manage their execution.
start_date = datetime.today() - timedelta(days=1)


default_args = {
    "owner": "airflow",
    "start_date": start_date,
    "retries": 1,  # number of retries before failing the task
    "retry_delay": timedelta(seconds=5),
}


with DAG(
    dag_id="kafka_spark_dag",
    default_args=default_args,
    schedule_interval=timedelta(days=1),
    catchup=False,
) as dag:

    kafka_stream_task = PythonOperator(
        task_id="kafka_data_stream",
        python_callable=stream,
        dag=dag,
    )

    spark_stream_task = DockerOperator(
        task_id="pyspark_consumer",
        image="rappel-conso/spark:latest",
        api_version="auto",
        auto_remove=True,
        command="./bin/spark-submit --master local[*] --packages org.postgresql:postgresql:42.5.4,org.apache.spark:spark-sql-kafka-0-10_2.12:3.5.0 ./spark_streaming.py",
        docker_url='tcp://docker-proxy:2375',
        environment={'SPARK_LOCAL_HOSTNAME': 'localhost'},
        network_mode="airflow-kafka",
        dag=dag,
    )


    kafka_stream_task >> spark_stream_task
Here are the key elements from this configuration
- The tasks are set to execute daily.
- The first task is the Kafka Stream Task. It is implemented using the PythonOperator to run the Kafka streaming function. This task streams data from the RappelConso API into a Kafka topic, initiating the data processing workflow.
- The downstream task is the Spark Stream Task. It uses the DockerOperator for execution. It runs a Docker container with our custom Spark image, tasked with processing the data received from Kafka.
- The tasks are arranged sequentially, where the Kafka streaming task precedes the Spark processing task. This order is crucial to ensure that data is first streamed and loaded into Kafka before being processed by Spark.
About the DockerOperator
Using docker operator allow us to run docker-containers that correspond to our tasks. The main advantage of this approach is easier package management, better isolation and enhanced testability. We will demonstrate the use of this operator with the spark streaming task.
Here are some key details about the docker operator for the spark streaming task:
- We will use the image rappel-conso/spark:latest specified in the Spark Set-up section.
- The command will run the Spark submit command inside the container, specifying the master as local, including necessary packages for PostgreSQL and Kafka integration, and pointing to the spark_streaming.py script that contains the logic for the Spark job.
- docker_url represents the url of the host running the docker daemon. The natural solution is to set it as unix://var/run/docker.sock and to mount the var/run/docker.sock in the airflow docker container. One problem we had with this approach is a permission error to use the socket file inside the airflow container. A common workaround, changing permissions with chmod 777 var/run/docker.sock, poses significant security risks. To circumvent this, we implemented a more secure solution using bobrik/socat as a docker-proxy. This proxy, defined in a Docker Compose service, listens on TCP port 2375 and forwards requests to the Docker socket:
  docker-proxy:
    image: bobrik/socat
    command: "TCP4-LISTEN:2375,fork,reuseaddr UNIX-CONNECT:/var/run/docker.sock"
    ports:
      - "2376:2375"
    volumes:
      - /var/run/docker.sock:/var/run/docker.sock
    networks:
      - airflow-kafka
In the DockerOperator, we can access the host docker /var/run/docker.sock via thetcp://docker-proxy:2375 url, as described here and here.
- Finally we set the network mode to airflow-kafka. This allows us to use the same network as the proxy and the docker running kafka. This is crucial since the spark job will consume the data from the kafka topic so we must ensure that both containers are able to communicate.
After defining the logic of our DAG, let’s understand now the airflow services configuration in the docker-compose-airflow.yaml file.
Airflow Configuration
The compose file for airflow was adapted from the official apache airflow docker-compose file. You can have a look at the original file by visiting this link.
As pointed out by this article, this proposed version of airflow is highly resource-intensive mainly because the core-executor is set to CeleryExecutor that is more adapted for distributed and large-scale data processing tasks. Since we have a small workload, using a single-noded LocalExecutor is enough.
Here is an overview of the changes we made on the docker-compose configuration of airflow:
- We set the environment variable AIRFLOW__CORE__EXECUTOR to LocalExecutor.
- We removed the services airflow-worker and flower because they only work for the Celery executor. We also removed the redis caching service since it works as a backend for celery. We also won’t use the airflow-triggerer so we remove it too.
- We replaced the base image ${AIRFLOW_IMAGE_NAME:-apache/airflow:2.7.3} for the remaining services, mainly the scheduler and the webserver, by a custom image that we will build when running the docker-compose.
version: '3.8'
x-airflow-common:
  &airflow-common
  build:
    context: .
    dockerfile: ./airflow_resources/Dockerfile
  image: de-project/airflow:latest
- We mounted the necessary volumes that are needed by airflow. AIRFLOW_PROJ_DIR designates the airflow project directory that we will define later. We also set the network as airflow-kafka to be able to communicate with the kafka boostrap servers.
volumes:
  - ${AIRFLOW_PROJ_DIR:-.}/dags:/opt/airflow/dags
  - ${AIRFLOW_PROJ_DIR:-.}/logs:/opt/airflow/logs
  - ${AIRFLOW_PROJ_DIR:-.}/config:/opt/airflow/config
  - ./src:/opt/airflow/dags/src
  - ./data/last_processed.json:/opt/airflow/data/last_processed.json
user: "${AIRFLOW_UID:-50000}:0"
networks:
  - airflow-kafka
Next, we need to create some environment variables that will be used by docker-compose:
echo -e "AIRFLOW_UID=$(id -u)nAIRFLOW_PROJ_DIR="./airflow_resources"" > .env
Where AIRFLOW_UID represents the User ID in Airflow containers and AIRFLOW_PROJ_DIR represents the airflow project directory.
Now everything is set-up to run your airflow service. You can start it with this command:
docker compose -f docker-compose-airflow.yaml up
Then to access the airflow user interface you can visit this url http://localhost:8080 .
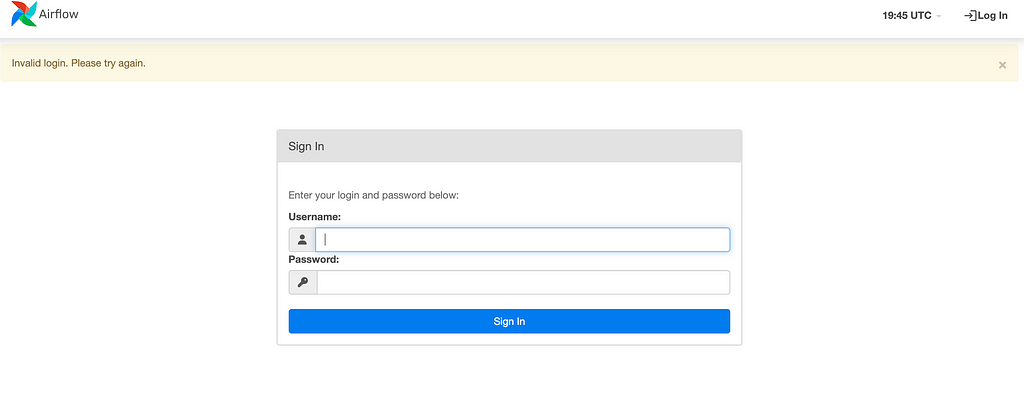
By default, the username and password are airflow for both. After signing in, you will see a list of Dags that come with airflow. Look for the dag of our project kafka_spark_dag and click on it.
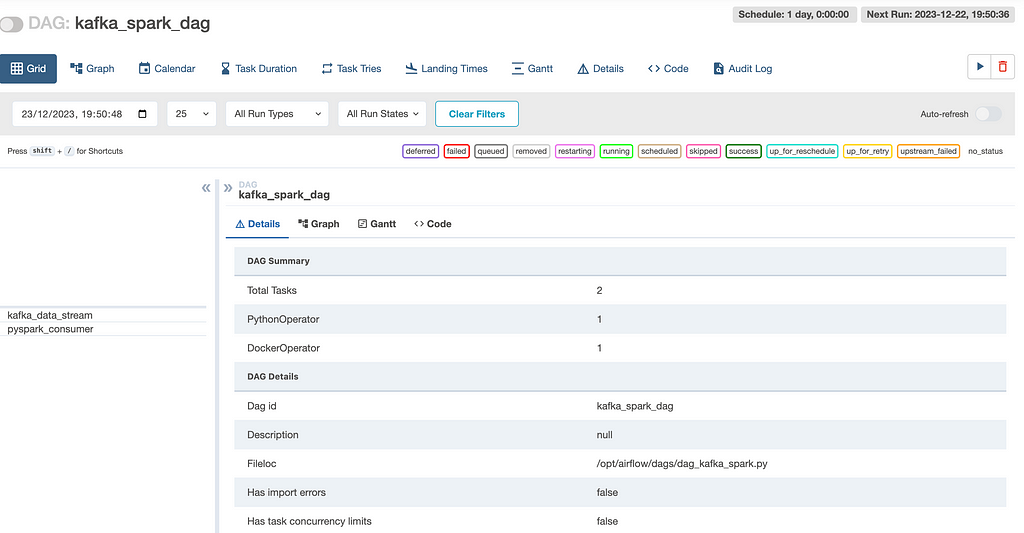
You can start the task by clicking on the button next to DAG: kafka_spark_dag.
Next, you can check the status of your tasks in the Graph tab. A task is done when it turns green. So, when everything is finished, it should look something like this:
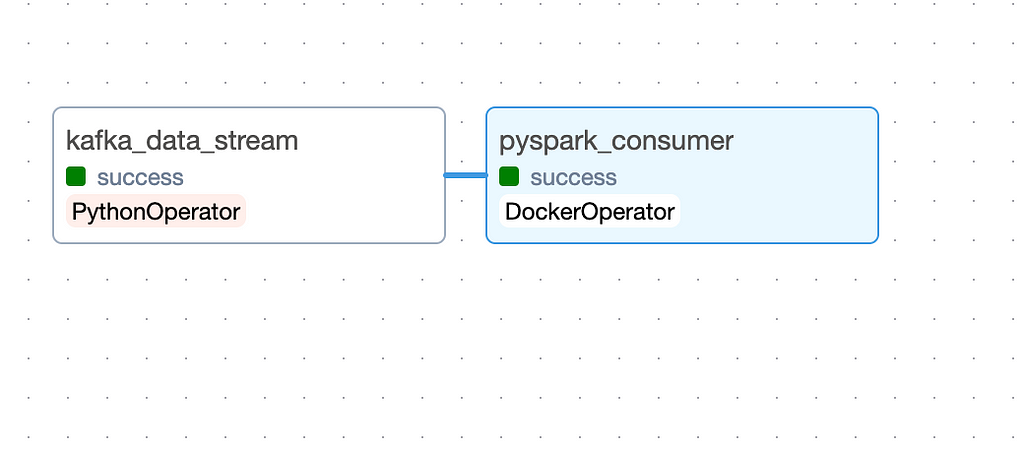
To verify that the rappel_conso_table is filled with data, use the following SQL query in the pgAdmin Query Tool:
SELECT count(*) FROM rappel_conso_table
When I ran this in January 2024, the query returned a total of 10022 rows. Your results should be around this number as well.
Conclusion
This article has successfully demonstrated the steps to build a basic yet functional data engineering pipeline using Kafka, Airflow, Spark, PostgreSQL, and Docker. Aimed primarily at beginners and those new to the field of data engineering, it provides a hands-on approach to understanding and implementing key concepts in data streaming, processing, and storage.
Throughout this guide, we’ve covered each component of the pipeline in detail, from setting up Kafka for data streaming to using Airflow for task orchestration, and from processing data with Spark to storing it in PostgreSQL. The use of Docker throughout the project simplifies the setup and ensures consistency across different environments.
It’s important to note that while this setup is ideal for learning and small-scale projects, scaling it for production use would require additional considerations, especially in terms of security and performance optimization. Future enhancements could include integrating more advanced data processing techniques, exploring real-time analytics, or even expanding the pipeline to incorporate more complex data sources.
In essence, this project serves as a practical starting point for those looking to get their hands dirty with data engineering. It lays the groundwork for understanding the basics, providing a solid foundation for further exploration in the field.
In the second part, we’ll explore how to effectively use the data stored in our PostgreSQL database. We’ll introduce agents powered by Large Language Models (LLMs) and a variety of tools that enable us to interact with the database using natural language queries. So, stay tuned !
To reach out
- LinkedIn : https://www.linkedin.com/in/hamza-gharbi-043045151/
- Twitter : https://twitter.com/HamzaGh25079790
End-to-End Data Engineering System on Real Data with Kafka, Spark, Airflow, Postgres, and Docker was originally published in Towards Data Science on Medium, where people are continuing the conversation by highlighting and responding to this story.
Originally appeared here:
End-to-End Data Engineering System on Real Data with Kafka, Spark, Airflow, Postgres, and Docker
