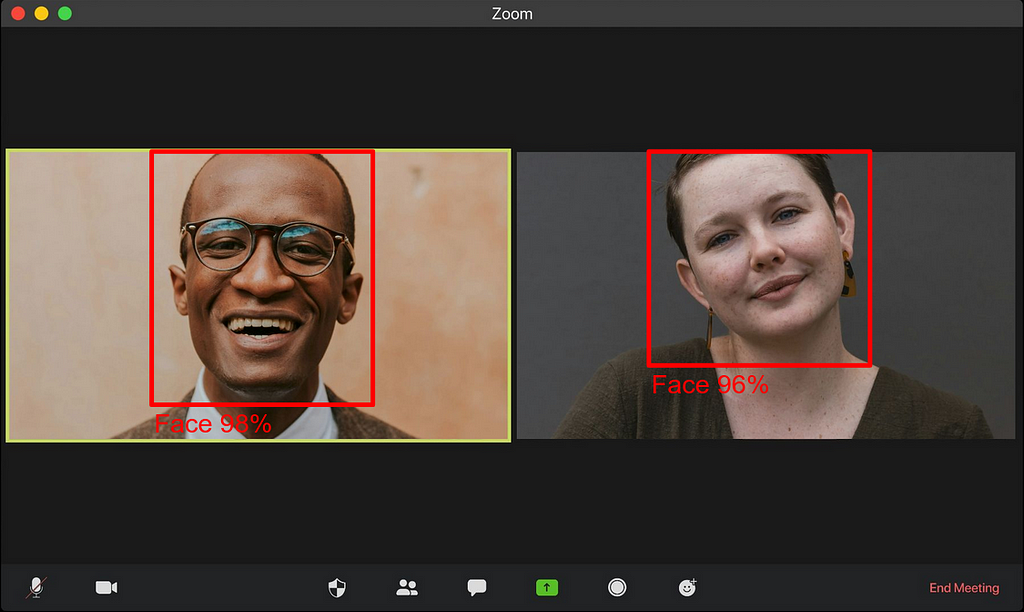
A step-by-step guide to training a BlazeFace model, from the Python training pipeline to the JavaScript demo through model conversion.

Thanks to libraries such as YOLO by Ultralytics, it is fairly easy today to make robust object detection models with as little as a few lines of code. Unfortunately, those solutions are not yet fast enough to work in a web browser on a real-time video stream at 30 frames per second (which is usually considered the real-time limit for video applications) on any device. More often than not, it will run at less than 10 fps on an average mobile device.
The most famous real-time object detection solution on web browser is Google’s MediaPipe. This is a really convenient and versatile solution, as it can work on many devices and platforms easily. But what if you want to make your own solution?
In this post, we propose to build our own lightweight, fast and robust object detection model, that runs at more than 30 fps on almost any devices, based on the BlazeFace model. All the code used for this is available on my GitHub, in the blazeface folder.
The BlazeFace model, proposed by Google and originally used in MediaPipe for face detection, is really small and fast, while being robust enough for easy object detection tasks such as face detection. Unfortunately, to my knowledge, no training pipeline of this model is available online on GitHub; all I could find is this inference-only model architecture. Through this post, we will train our own BlazeFace model with a fully working pipeline and use it on browser with a working JavaScript code.
More specifically, we will go through the following steps:
- Training the model using PyTorch
- Converting the PyTorch model into a TFLite model
- Running the object detection in the browser thanks to JavaScript and TensorFlow.js
Let’s get started with the model training.
Training the PyTorch Model
As usual when training a model, there are a few typical steps in a training pipeline:
- Preprocessing the data: we will use a freely available Kaggle dataset for simplicity, but any dataset with the right format of labels would work
- Building the model: we will reuse the proposed architecture in the original paper and the inference-only GitHub code
- Training and evaluating the model: we will use a simple Multibox loss as the cost function to minimize
Let’s go through those steps together.
Data Preprocessing
We are going to use a subset of the Open Images Dataset V7, proposed by Google. This dataset is made of about 9 million images with many annotations (including bounding boxes, segmentation masks, and many others). The dataset itself is quite large and contains many types of images.
For our specific use case, I decided to select images in the validation set fulfilling two specific conditions:
- Containing labels of human face bounding box
- Having a permissive license for such a use case, more specifically the CC BY 2.0 license
The script to download and build the dataset under those strict conditions is provided in the GitHub, so that anyone can reproduce it. The downloaded dataset with this script contains labels in the YOLO format (meaning box center, width and height). In the end, the downloaded dataset is made of about 3k images and 8k faces, that I have separated into train and validation set with a 80%-20% split ratio.
From this dataset, typical preprocessing it required before being able to train a model. The data preprocessing code I used is the following:
As we can see, the preprocessing is made of the following steps:
- It loads images and labels
- It converts labels from YOLO format (center position, width, height) to box corner format (top-left corner position, bottom-right corner position)
- It resizes images to the target size (e.g. 128 pixels), and adds padding if necessary to keep the original image aspect ratio and avoid image deformation. Finally, it normalizes the images.
Optionally, this code allows for data augmentation using Albumentations. For the training, I used the following data augmentations:
- Horizontal flip
- Random brightness contrast
- Random crop from borders
- Affine transformation
Those augmentations will allow us to have a more robust, regularized model. After all those transformations and augmentations, the input data may look like the following sample:
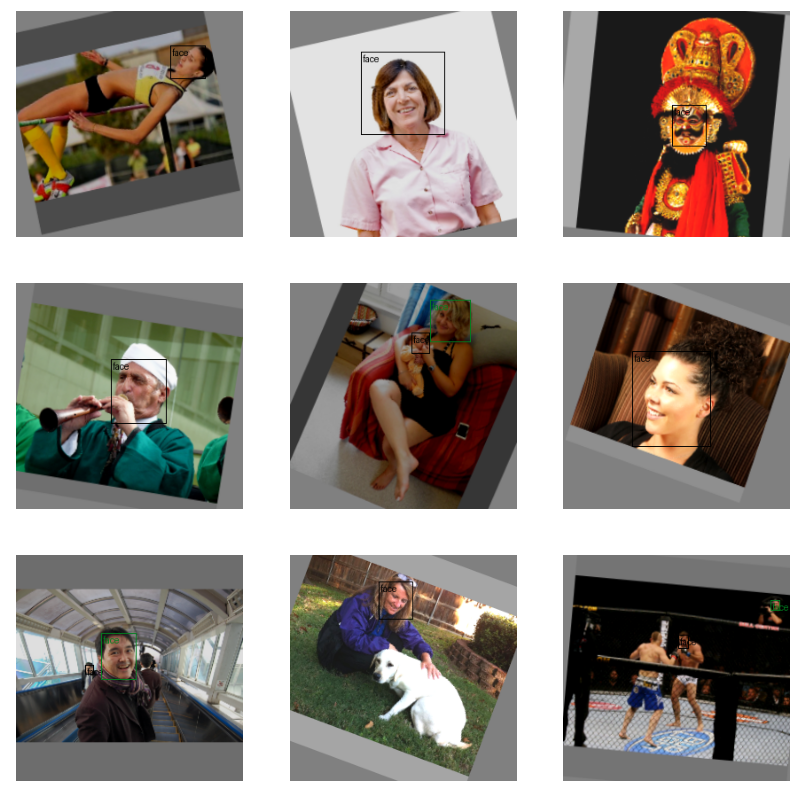
As we can see, the preprocessed images have grey borders because of augmentation (with rotation or translation) or padding (because the original image did not have a square aspect ratio). They all contain faces, although the context might be really different depending on the image.
Important Note:
Face detection is a highly sensitive task with significant ethical and safety considerations. Bias in the dataset, such as underrepresentation or overrepresentation of certain facial characteristics, can lead to false negatives or false positives, potentially causing harm or offense. See below a dedicated section about ethical considerations.
Now that our data can be loaded and preprocessed, let’s go to the next step: building the model.
Model Building
In this section, we will build the model architecture of the original BlazeFace model, based on the original article and adapted from the BlazeFace repository containing inference code only.
The whole BlazeFace architecture is rather simple and is mostly made of what the paper’s author call a BlazeBlock, with various parameters.
The BlazeBlock can be defined with PyTorch as follows:
As we can see from this code, a BlazeBlock is simply made of the following layers:
- One depthwise 2D convolution layer
- One batch norm 2D layer
- One 2D convolution layer
- One batch norm 2D layer
N.B.: You can read the PyTorch documentation for more about these layers: Conv2D layer and BatchNorm2D layer.
This block is repeated many times with different input parameters, to go from a 128-pixel image up to a typical object detection prediction using tensor reshaping in the final stages. Feel free to have a look at the full code in the GitHub repository for more about the implementation of this architecture.
Before moving to the next section about training the model, note that there are actually two architectures:
- A 128-pixel input image architecture
- A 256-pixel input image architecture
As you can imagine, the 256-pixel architecture is slightly larger, but still lightweight and sometimes more robust. This architecture is also implemented in the provided code, so that you can use it if you want.
N.B.: The original BlazeFace model not only predicts a bounding box, but also six approximate face landmarks. Since I did not have such labels, I simplified the model architecture to predict only the bounding boxes.
Now that we can build a model, let’s move on to the next step: training the model.
Model Training
For anyone familiar with PyTorch, training models such as this one is usually quite simple and straightforward, as shown in this code:
As we can see, the idea is to loop over your data for a given number of epochs, one batch at a time, and do the following:
- Get the processed data and corresponding labels
- Make the forward inference
- Compute the loss of the inference against the label
- Update the weights
I am not getting into all the details for clarity in this post, but feel free to navigate through the code to get a better sense of the training part if needed.
After training on 100 epochs, I had the following results on the validation set:
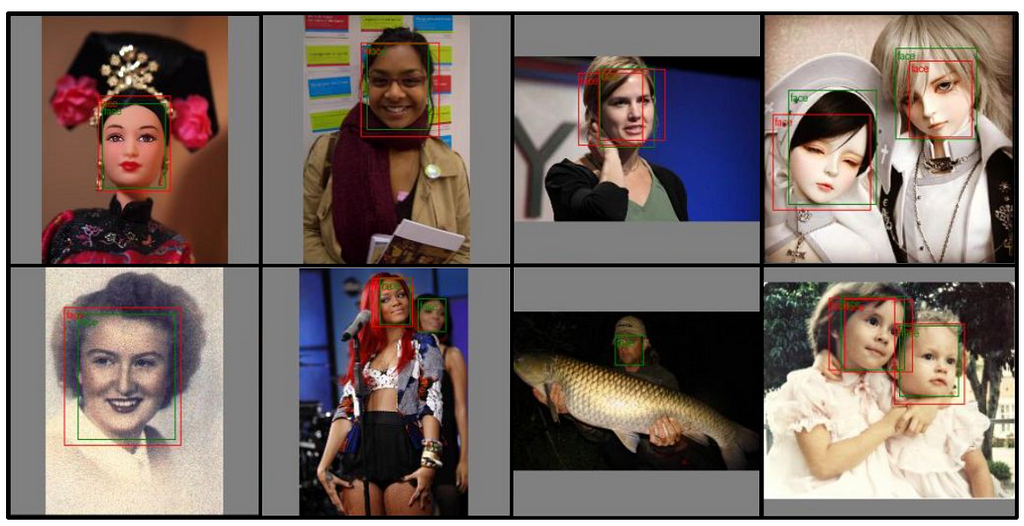
As we can see on those results, even if the object detection is not perfect, it works pretty well for most cases (probably the IoU threshold was not optimal, leading sometimes to overlapping boxes). Keep in mind it’s a very light model; it can’t exhibit the same performances as a YOLOv8, for example.
Before going to the next step about converting the model, let’s have a short discussion about ethical and safety considerations.
Ethical and Safety Considerations
Let’s go over a few points about ethics and safety, since face detection can be a very sensitive topic:
- Dataset importance and selection: This dataset is used to demonstrate face detection techniques for educational purposes. It was chosen for its relevance to the topic, but it may not fully represent the diversity needed for unbiased results.
- Bias awareness: The dataset is not claimed to be bias-free, and potential biases have not been fully mitigated. Please be aware of potential biases that can affect the accuracy and fairness of face detection models.
- Risks: The trained face detection model may reflect these biases, raising potential ethical concerns. Users should critically assess the outcomes and consider the broader implications.
To address these concerns, anyone willing to build a product on such topic should focus on:
- Collecting diverse and representative images
- Verifying the data is bias-free and any category is equally represented
- Continuously evaluating the ethical implications of face detection technologies
N.B.: A useful approach to address these concerns is to examine what Google did for their own face detection and face landmarks models.
Again, the used dataset is intended solely for educational purposes. Anyone willing to use it should exercise caution and be mindful of its limitations when interpreting results. Let’s now move to the next step with the model conversion.
Converting the Model
Remember that our goal is to make our object detection model work in a web browser. Unfortunately, once we have a trained PyTorch model, we can not directly use it in a web browser. We first need to convert it.
Currently, to my knowledge, the most reliable way to run a deep learning model in a web browser is by using a TFLite model with TensorFlow.js. In other words, we need to convert our PyTorch model into a TFLite model.
N.B.: Some alternative ways are emerging, such as ExecuTorch, but they do not seem to be mature enough yet for web use.
As far as I know, there is no robust, reliable way to do so directly. But there are side ways, by going through ONNX. ONNX (which stands for Open Neural Network Exchange) is a standard for storing and running (using ONNX Runtime) machine learning models. Conveniently, there are available libraries for conversion from torch to ONNX, as well as from ONNX to TensorFlow models.
To summarize, the conversion workflow is made of the three following steps:
- Convert from PyTorch to ONNX
- Convert from ONNX to TensorFlow
- Convert from TensorFlow to TFLite
This is exactly what the following code does:
This code can be slightly more cryptic than the previous ones, as there are some specific optimizations and parameters used to make it work properly. One can also try to go one step further and quantize the TFLite model to make it even smaller. If you are interested in doing so, you can have a look at the official documentation.
N.B.: The conversion code is highly sensitive of the versions of the libraries. To ensure a smooth conversion, I would strongly recommend using the specified versions in the requirements.txt file on GitHub.
On my side, after TFLite conversion, I finally have a TFLite model of only about 400kB, which is lightweight and quite acceptable for web usage. Next step is to actually test it out in a web browser, and to make sure it works as expected.
On a side note, be aware that another solution is currently being developed by Google for PyTorch model conversion to TFLite format: AI Edge Torch. Unfortunately, this is quite new and I couldn’t make it work for my use case. However, any feedback about this library is very welcome.
Running the Model
Now that we finally have a TFLite model, we are able to run it in a web browser using TensorFlow.js. If you are not familiar with JavaScript (since this is not usually a language used by data scientists and machine learning engineers) do not worry; all the code is provided and is rather easy to understand.
I won’t comment all the code here, just the most relevant parts. If you look at the code on GitHub, you will see the following in the javascript folder:
- index.html: contains the home page running the whole demo
- assets: the folder containing the TFLite model that we just converted
- js: the folder containing the JavaScript codes
If we take a step back, all we need to do in the JavaScript code is to loop over the frames of the camera feed (either a webcam on a computer or the front-facing camera on a mobile phone) and do the following:
- Preprocess the image: resize it as a 128-pixel image, with padding and normalization
- Compute the inference on the preprocessed image
- Postprocess the model output: apply thresholding and non max suppression to the detections
We won’t comment the image preprocessing since this would be redundant with the Python preprocessing, but feel free to have a look at the code. When it comes to making an inference with a TFLite model in JavaScript, it’s fairly easy:
The tricky part is actually the postprocessing. As you may know, the output of a SSD object detection model is not directly usable: this is not the bounding boxes locations. Here is the postprocessing code that I used:
In the code above, the model output is postprocessed with the following steps:
- The boxes locations are corrected with the anchors
- The box format is converted to get the top-left and the bottom-right corners
- Non-max suppression is applied to the boxes with the detection score, allowing the removal of all boxes below a given threshold and overlapping other already-existing boxes
This is exactly what has been done in Python too to display the resulting bounding boxes, if it may help you get a better understanding of that part.
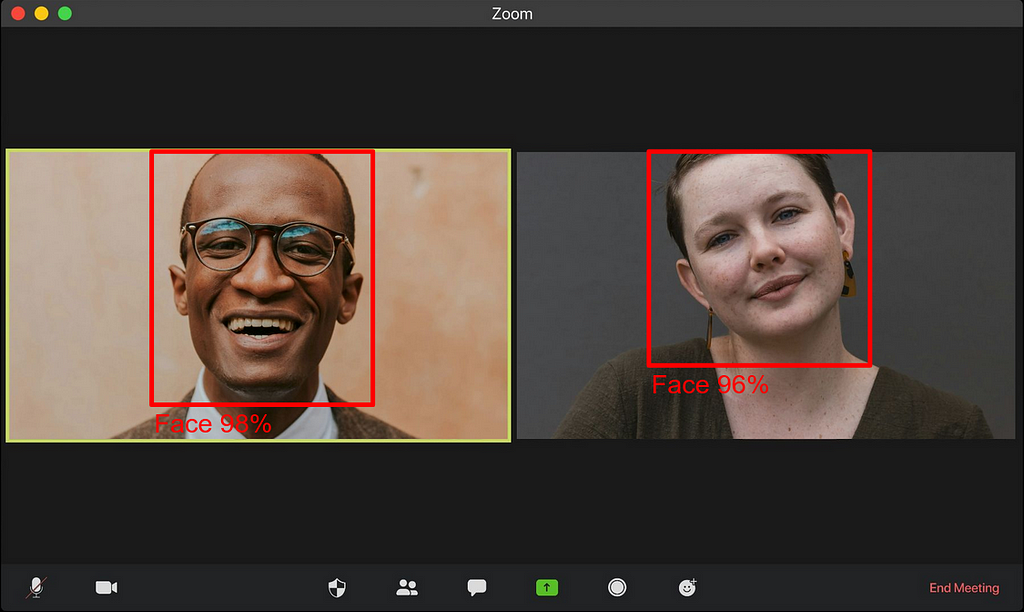
Finally, below is a screenshot of the resulting web browser demo:
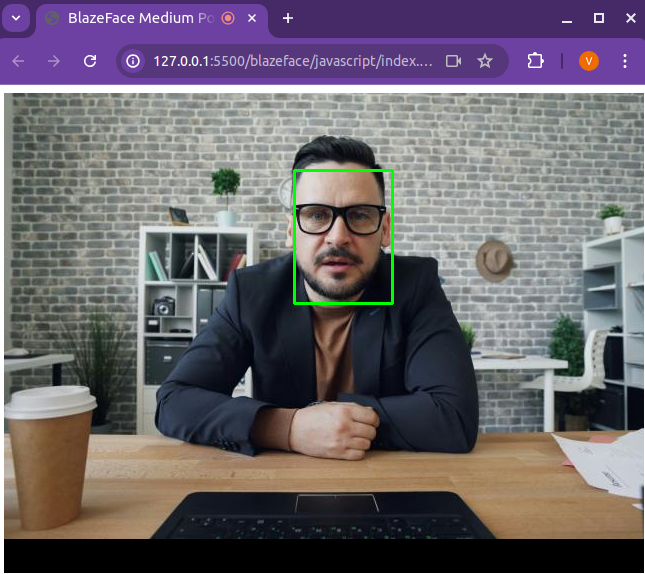
As you can see, it properly detects the face in the image. I decided to use a static image from Unsplash, but the code on GitHub allows you to run it on your webcam, so feel free to test it yourself.
Before concluding, note that if you run this code on your own computer or smartphone, depending on your device you may not reach 30 fps (on my personal laptop having a rather old 2017 Intel® Core™ i5–8250U, it runs at 36fps). If that’s the case, a few tricks may help you get there. The easiest one is to run the model inference only once every N frames (N to be fine tuned depending on your application, of course). Indeed, in most cases, from one frame to the next, there are not many changes, and the boxes can remain almost unchanged.
Conclusion
I hope you enjoyed reading this post and thanks if you got this far. Even though doing object detection is fairly easy nowadays, doing it with limited resources can be quite challenging. Learning about BlazeFace and converting models for web browser gives some insights into how MediaPipe was built, and opens the way to other interesting applications such as blurring backgrounds in video call (like Google Meets or Microsoft Teams) in real time in the browser.
References
- The Open Images Dataset publication
- The GitHub repo containing all the working code in the folder blazeface
- The original GitHub containing inference code for BlazeFace
- The BlazeFace paper
- MediaPipe’s face detection and BlazeFace model card
- ONNX and ONNX Runtime
- TFLite quantization
BlazeFace: How to Run Real-time Object Detection in the Browser was originally published in Towards Data Science on Medium, where people are continuing the conversation by highlighting and responding to this story.
Originally appeared here:
BlazeFace: How to Run Real-time Object Detection in the Browser
Go Here to Read this Fast! BlazeFace: How to Run Real-time Object Detection in the Browser
